|
This bow presented a new challenge I haven't
had to tackle before. Because of the overall shape of the bow being more angular
than curved, I didn't see a good way to get a good amount of accuracy while
modifying an existing bow. The only way I could see was to make one from
scratch.
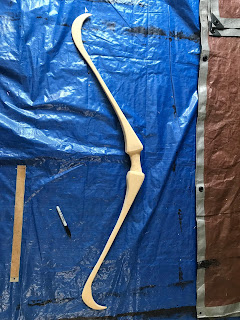
This bow was made entirely of MDF (medium density fiber), glued together in
layers and then sanded to the correct shape. The biggest downside to using this
method is that the bow isn't strong enough to hold the weight of a taught
bowstring, and requires an elastic one. This means that a bow of this type
cannot be easily worn over the shoulder without some extra engineering.
Materials
Bow template print-out
1/2 inch MDF board (cut into 2x4' panels)
Wood Glue
Wood Clamps
Disposable paint brush
Sanding Materials (including a belt sander)
Dremel Rotary Tool
Bondo Wood Filler
Filler Putty Spray Primer
Brown spray paint
Twine
Raffia in Multiple Colors
Weaving Loom
Hot Glue Gun
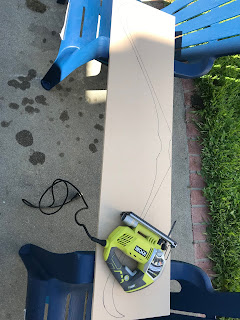
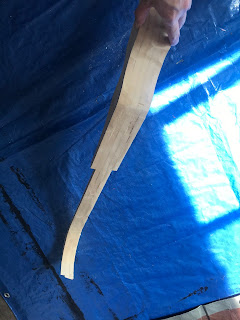
Step One: Sort out a Template
First thing I had to do was figure out how long I wanted the bow to be. I am a
rather tall person so I estimated about 48" long from tip to tip (including the
bow curve) would look proportional. Then I had to print out a picture of the bow
to be this size.

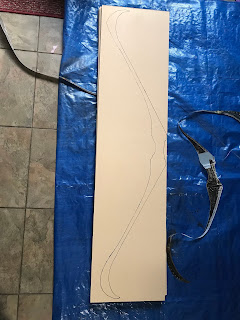
I had to cut off all the white spacers in between each page, before taping them
together and cutting out the bow.
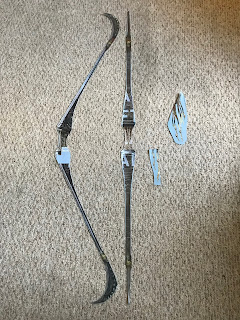
I hung onto the decorative strands just so I could have a frame of reference for
how large to make mine.
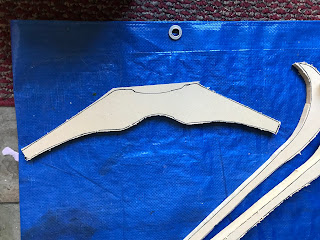
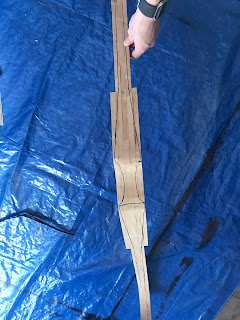
Step 2: Trace the bow shape onto all the boards
I used a marker to trace the shape of the bow onto 6 of the boards. Five of them
were traced with the template facing up, and one was drawn with it facing down.

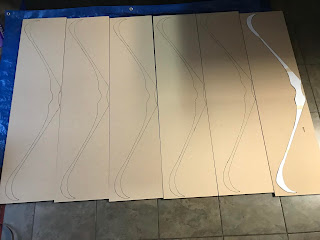
Step 3: Cut out all of the pieces
I used a jigsaw to cut out the rough shape of the bow, making sure not to cut
inside the marker lines. Since these will be stacked and glued, I only cut the
middle part of the bow out for the top and bottom pieces because it will be
significantly thicker than the ends of the bow. (cuts down on sanding time, too)
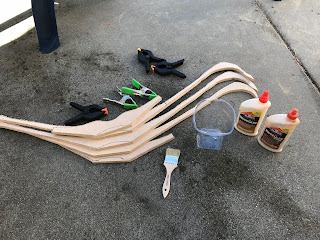
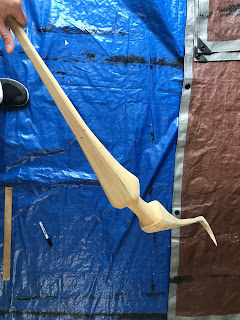
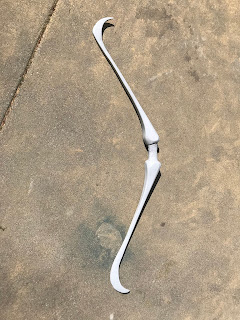
Step 4: Glue them all together
Next I glued the pieces together using wood glue and a brush. I did this all in
sections, gluing only one at a time, clamping them, and letting them dry before
doing the next. This reduces the risk of them slipping out of place while
drying. The short handle pieces go on the outside.

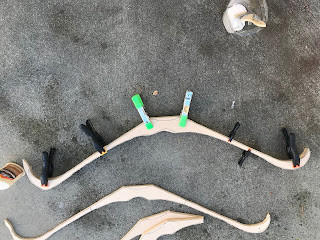
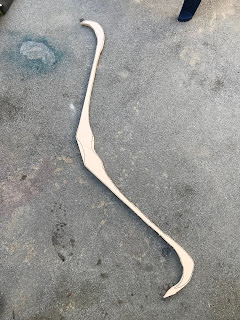
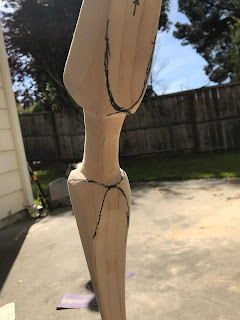
After everything was glued, I had a shape that looked like this. I used my side
bow template to draw the lines on the side of the bow to use as guide lines when
I sand it down.
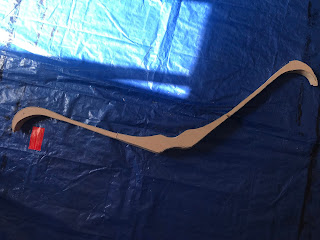
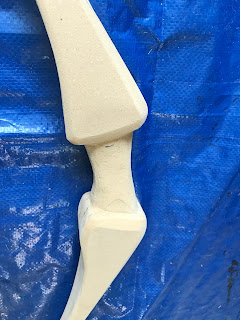
Step 5: Sand, Sand, Sand
This was by far the most tedious part of the project. Even with a belt sander, I
still spent three days, getting the bow to a shape I was happy with. It's better
to work slowly and carefully to make sure the bow doesn't break or get sanded
too far down. I started with a very low grit sandpaper (80) to shape it,
followed by a very high grit (400) to smooth it down as much as possible.

Step 6: Filler
Next I decided to spray the putty filler spray, but before that I wanted to tape
the handle to keep it bare MDF for later when I would use glue to secure the
twine handle. Rough surfaces are much better for adhering to glue than smooth
ones.


Step 7: Filler
I didn't get photos of this step, but what I did was go around the bow, looking
for significant imperfections in the shape, and fill with the Bondo. This was
needed mostly in areas where you could see the multiple layers of boards glued
together. The Bondo will erase those lines. I lathered it up and then sanded it
smooth.
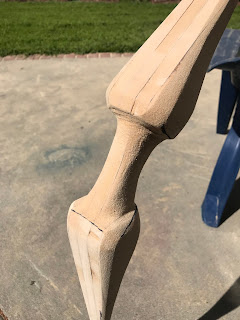
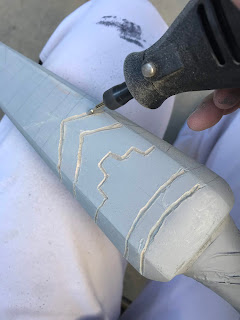
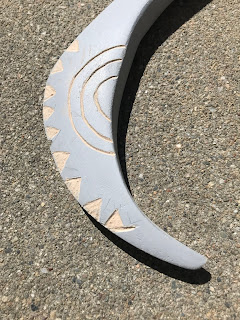
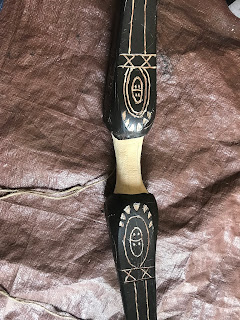
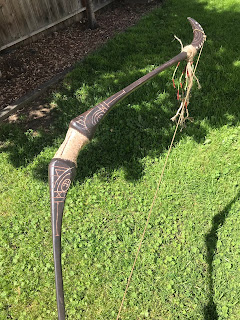
Step 8: Decorative Etchings
After the Bondo was dried and sanded, I drew the decorative etching lines onto
the bow using pencil and my template for reference. I used a dremel to carefully
carve the design into it. This step had a lot of mistakes but for this project,
it works. It adds to the character of the bow and makes it look more weathered
and rugged.

Step 9: Paint!
Again, I didn't get photos of this step, but all that was done was a basic coat
of brown spray paint was applied. After that was dry, I went over all the
etchings again with the dremel so the natural wood color shows. When that was
finished, I topped it off with a matte clear coat to seal in the color.
Step 10: Decorations
When the bow was all painted, I could take off the masking tape that was wrapped
around the handle.
I used a children's weaving loom to weave this crosshatch pattern that would go
only on the back side of the bow. I didn't get photos of that step, however I
may do a small tutorial on that at a later point. Once the crosshatch was
weaved, I glued it to the back of the bow handle, using hot glue gun.

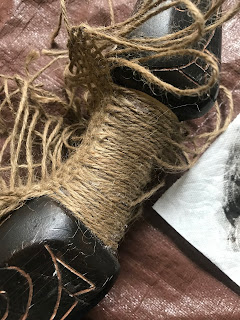
Then I took the strands on the sides and glued them all neatly around the
handle, making sure both sides met at the front of the bow. Because the front of
the bow handle is longer than the back, I had to glue extra strands into the
middle.
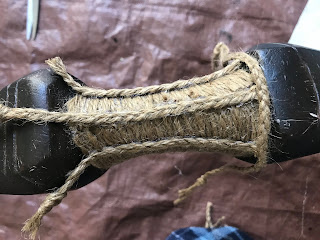
The front of the bow has three vertical braids, so I glued those on first,
before adding the horizontal braids that wrap around the top and bottom of the
handle.
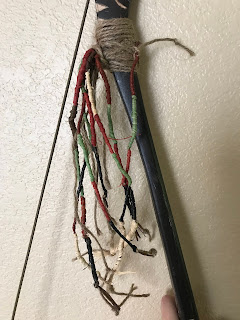
To make the decorative strands that hang from the top of the bow, I took some
twine and cut them into 4 strands, each about 2' long. On each of the ends I
wrapped the different colors of Raffia until it went up about 4 and 8 inches. I
made them all different lengths.
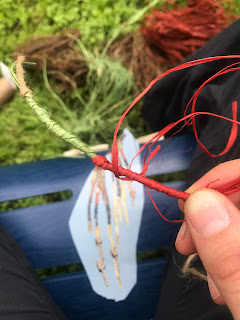
After I had the four strands all done, I tied them to the bow using an overhand
knot. I took some extra twine (without the raffia wrapping) and did a smaller
knot on the other end of the bow.
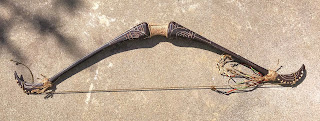
After that was done, I added an elastic bow string and the bow was finished!
Conclusion: Takeaways, Things I'd do Differently
This was the first time I had ever built a bow in this method, so naturally
there are things I kinda messed up on and would do them differently if I had to
do it all over again.
The first rookie mistake I made was making the profile bow template the same
length as the side. This prevented me from using it to trace the sanding guide
lines on the side of my bow, because it was too short. Next time I use a bow
template, I will make sure to print the front/back profile the same length as
the entire CURVE of the bow, rather than the length of the bow when it is
flexed.
The second mistake I made was making too many MDF cutouts. 6 was too many, and I
only ended up using 5.
Instead of doing the putty spray, followed by bondo, then another coat of putty
spray, I should have done bondo first, as it would have adhered to the fibre a
lot better and saved time from having to do a second coat of putty filler spray.
I would have liked to add a wood grain texture after doing the putty spray, and
had I had more time to spend on this, I'd have done more research into methods
of doing this.
The last thing I would have done differently is round the back of the bow
instead of make it rectangular. This is a feature of the shape of her bow that
was very difficult to make out, given the limited reference material I had at
the time, so I don't consider it a huge deal, but if I had to do this project
all over again, that's how I would alter the shape of the bow.
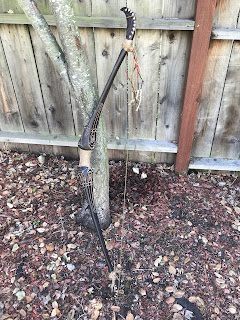
Overall, I am pretty happy with the way the bow came out. I am going to look
into methods to secure this bow so that it can be worn over the shoulder. If I
find a good one, I'll be sure to update this page.
Thank you for visiting this build article and I hope that some of you find it
useful! |
