|
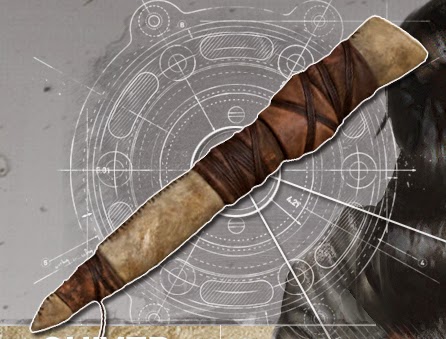
The Rise of the Tomb Raider quiver was a fun project and relatively
cheap to make. I worked on this as a collaborative effort with Meagan Marie (all
photos courtesy of her). All of the materials came from Tandy Leather and cost
around $100USD to make TWO quivers, one for Meagan and one for me. (~$50USD per
quiver)
Here are my list of supplies, many of which included enough for two quivers,
such as the leather, thread, straps, and belt:
Rawhide- $35
Waxed Thread- $5
Bag of leather straps (varied widths)- $5
I don't see this on the Tandy site, I got it in-store
Glazed Pig Lining, Tan- $20
Unfinished Belt strips 3/4"- $10
3/4" Strap Buckle- $5
3/4" Belt Keeper- $1.50
Dark Brown and Dark Mahogany Dyes- $12
Rivets- $9
Other supplies/tools needed:
Black acrylic paint
natural sponges
tea bags
rough sandpaper
dremel
scissors
two sided tape
ruler
pencil
paper
-----------------------------------
HOW IT'S MADE
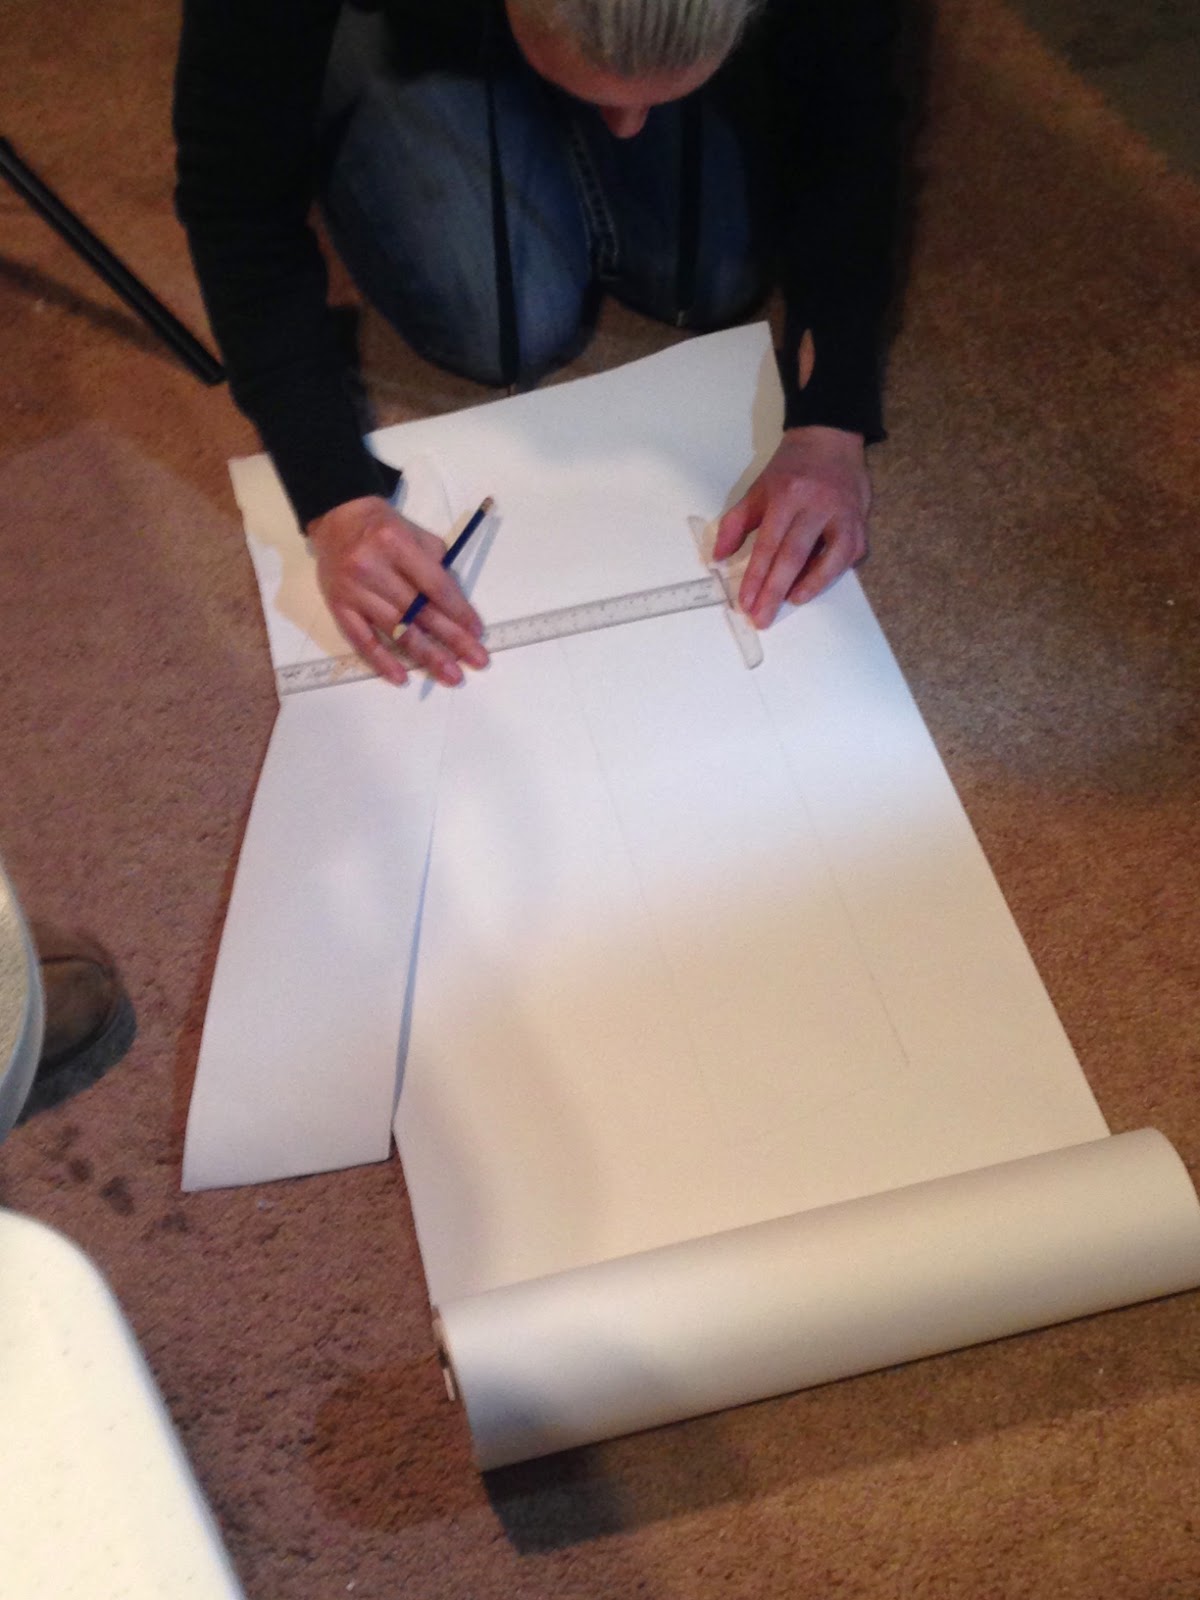
First we needed to draft a pattern for this. I found it easiest to measure with
my ruler how long the quiver should be by holding the ruler or tape measure to
my back and have someone measure where the top should sit and where the bottom
should sit. Then I used the length to sketch out an overall shape of what I
wanted it to look like. I traced both sides of it side by side on another piece
of paper to allow a foldable pattern.
After the pattern was made, it was transfered
to the rawhide and cut out with heavy duty scissors/leather shears.

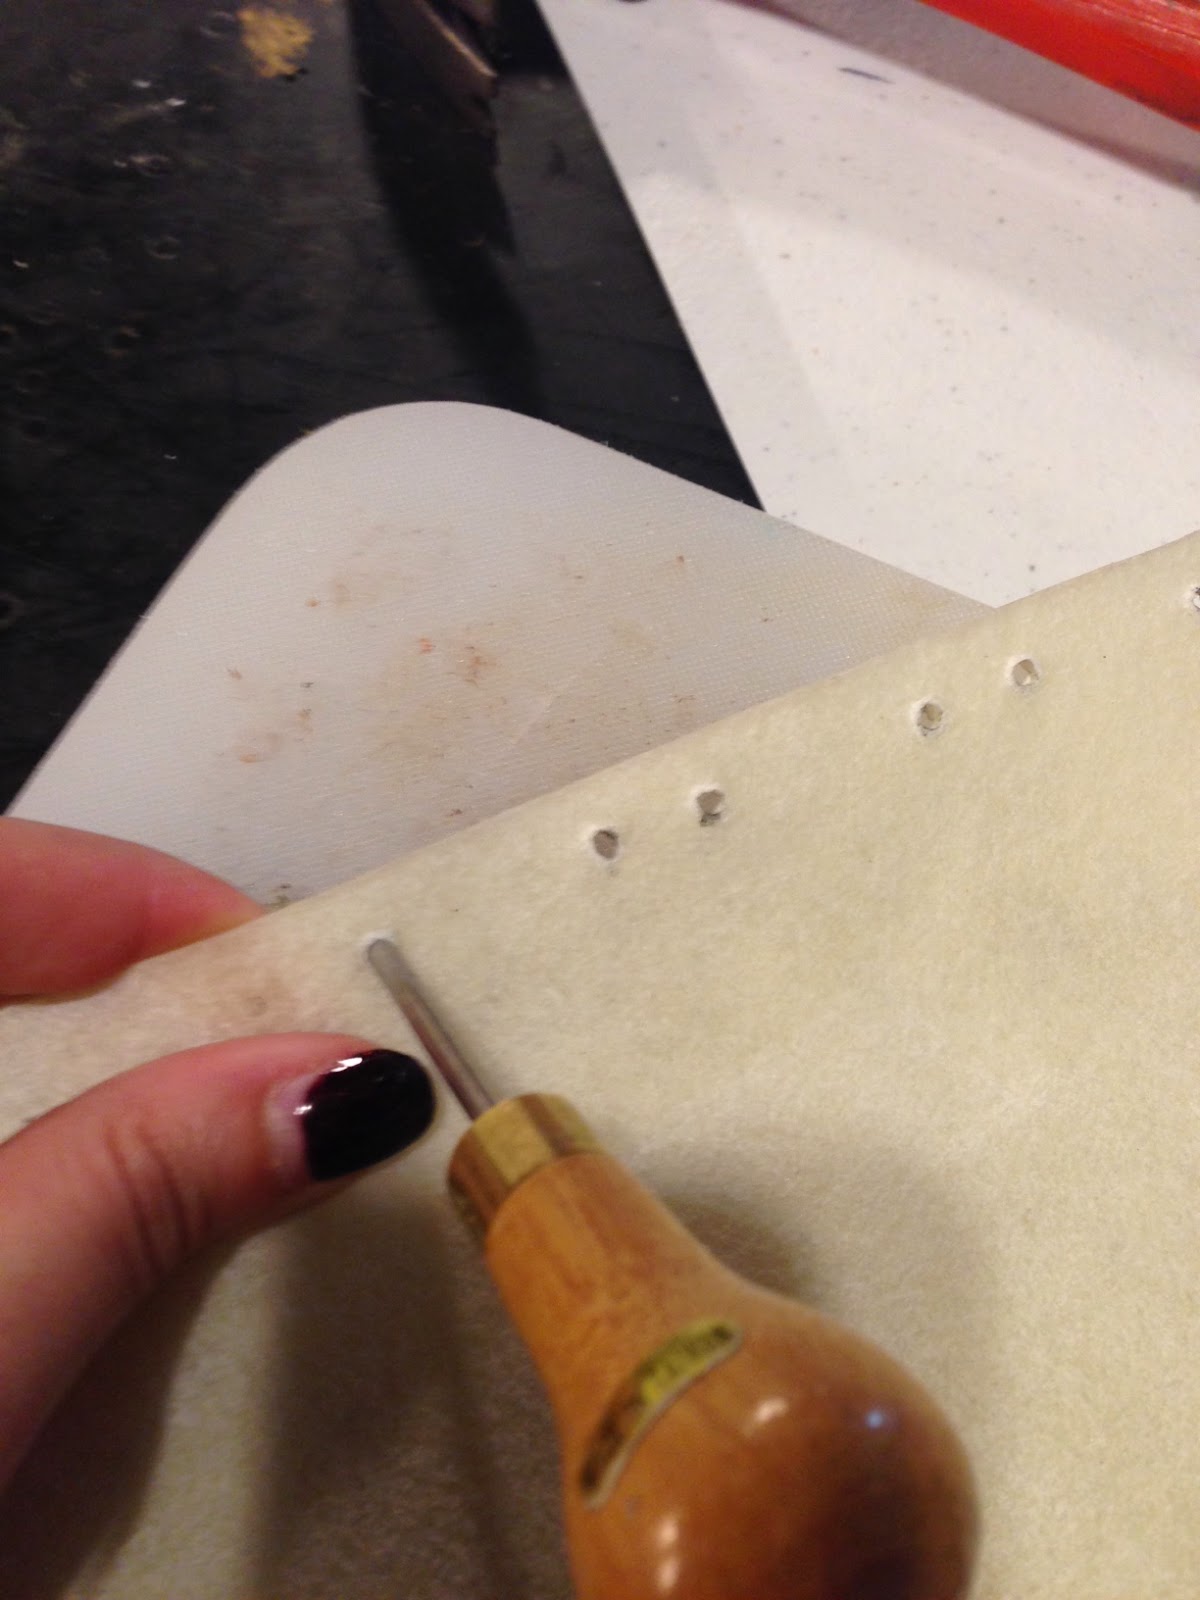
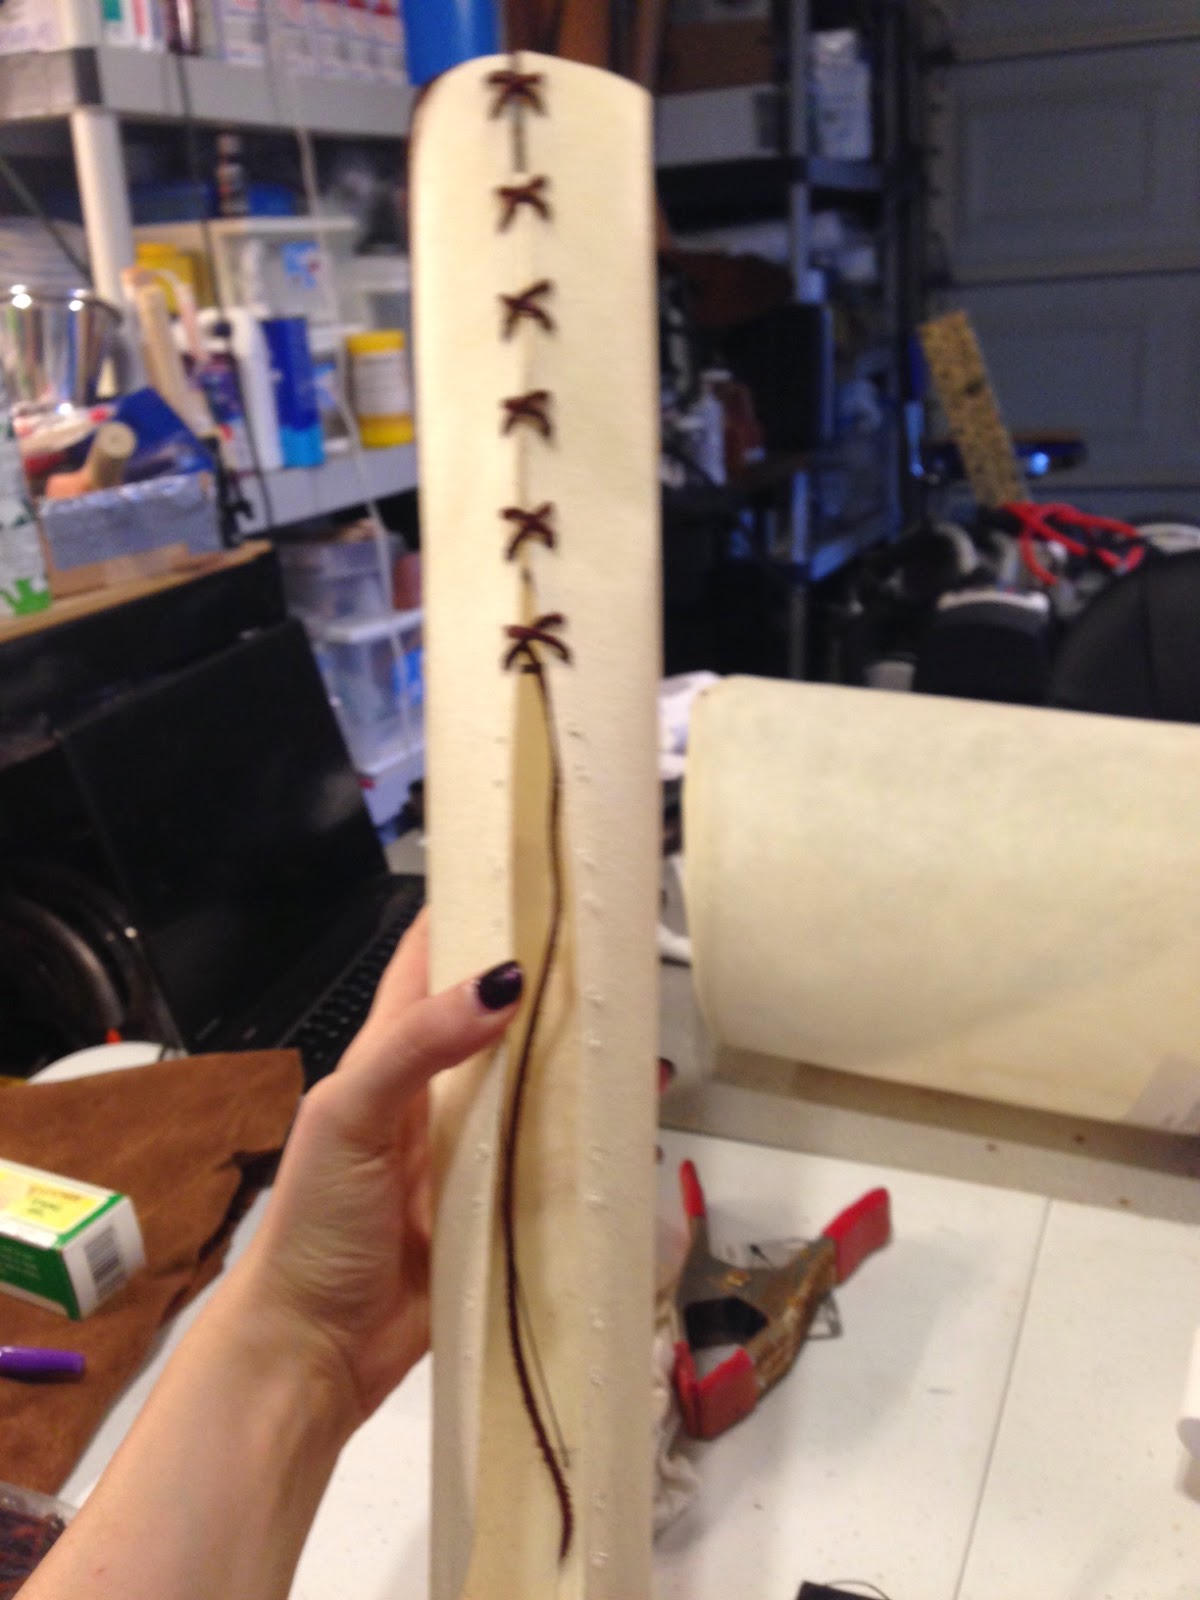
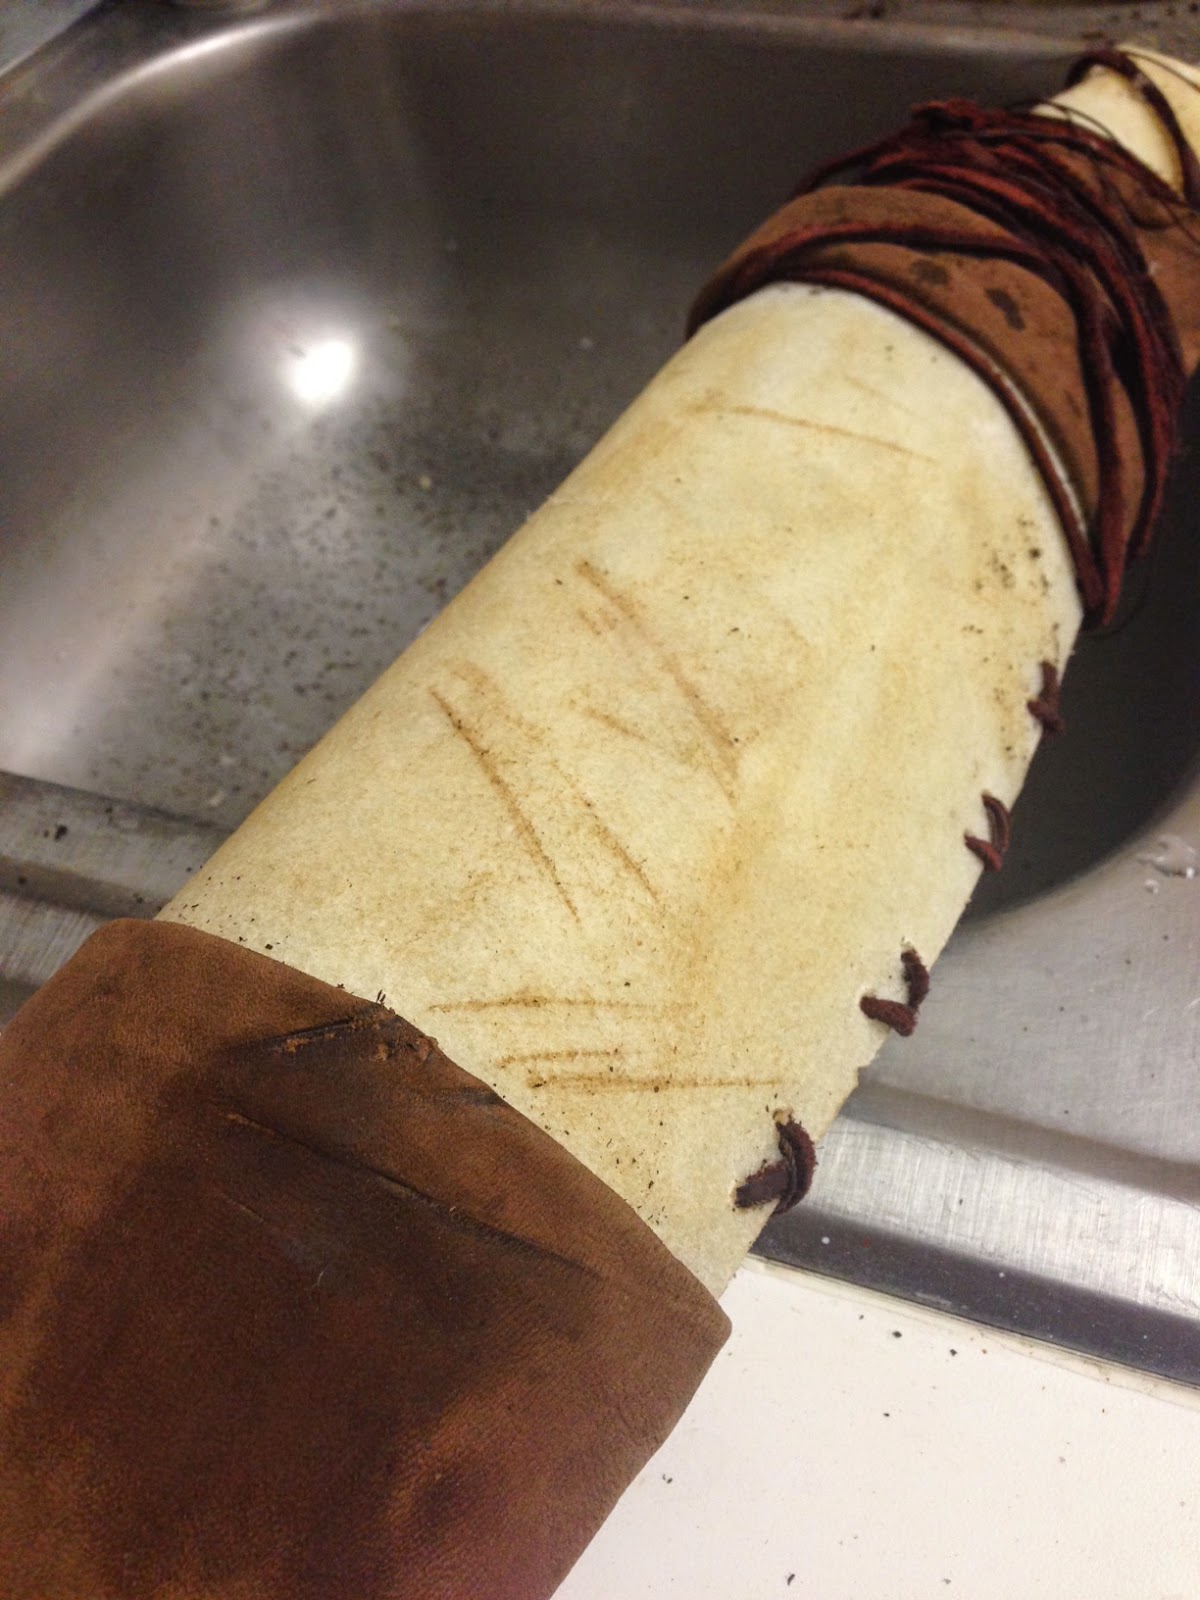
After the rawhide was cut out, holes were poked
along both of the edges in order for the lacing to close the quiver into a
cylinder shape. If you don't have a leather punch/needle you can use a dremel to
drill holes the appropriate diameter for your lacing (from your lacing/strap
bag).
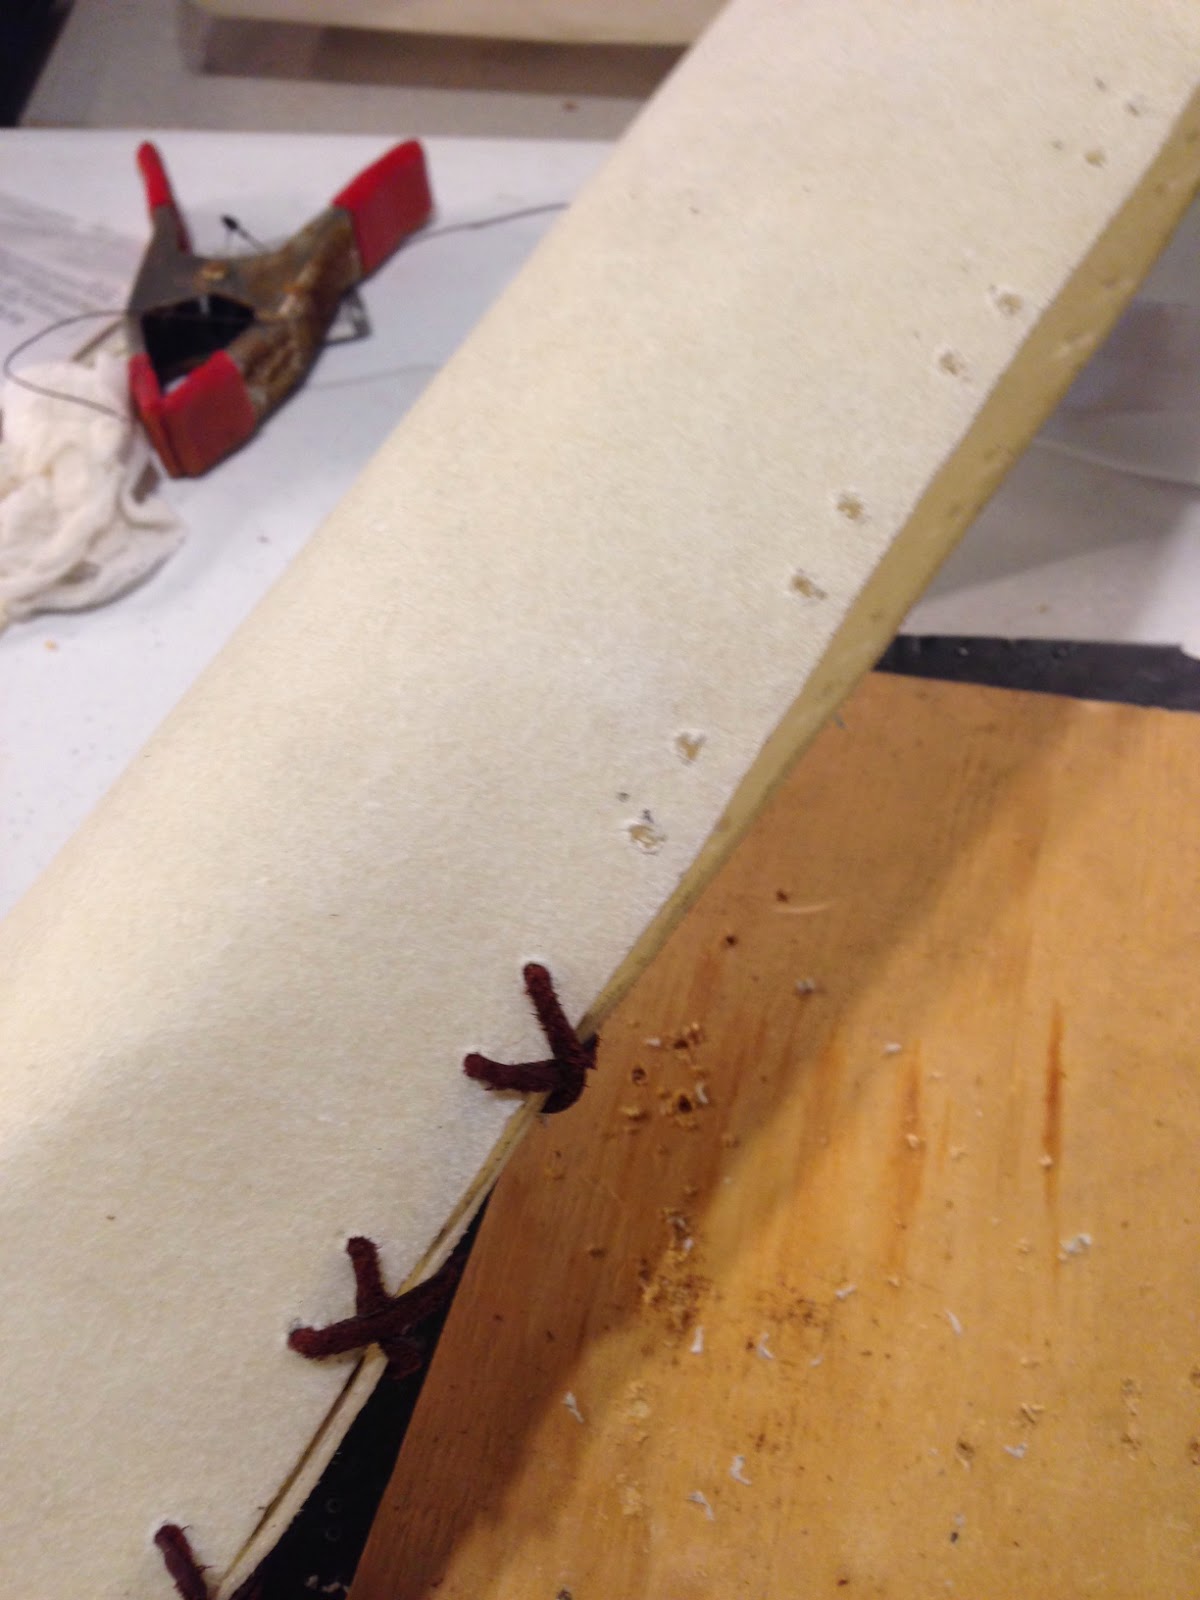
Once the holes were punched out, it was time to
lace the quiver together, just like you would lace a shoe. You need to be
careful to cut out enough strap/thong as well as waxed polyester thread to cover
the whole side. I used polyester thread as well because it is strong and while
the leather thong looks accurate, it isn't very strong so we needed to reinforce
it.
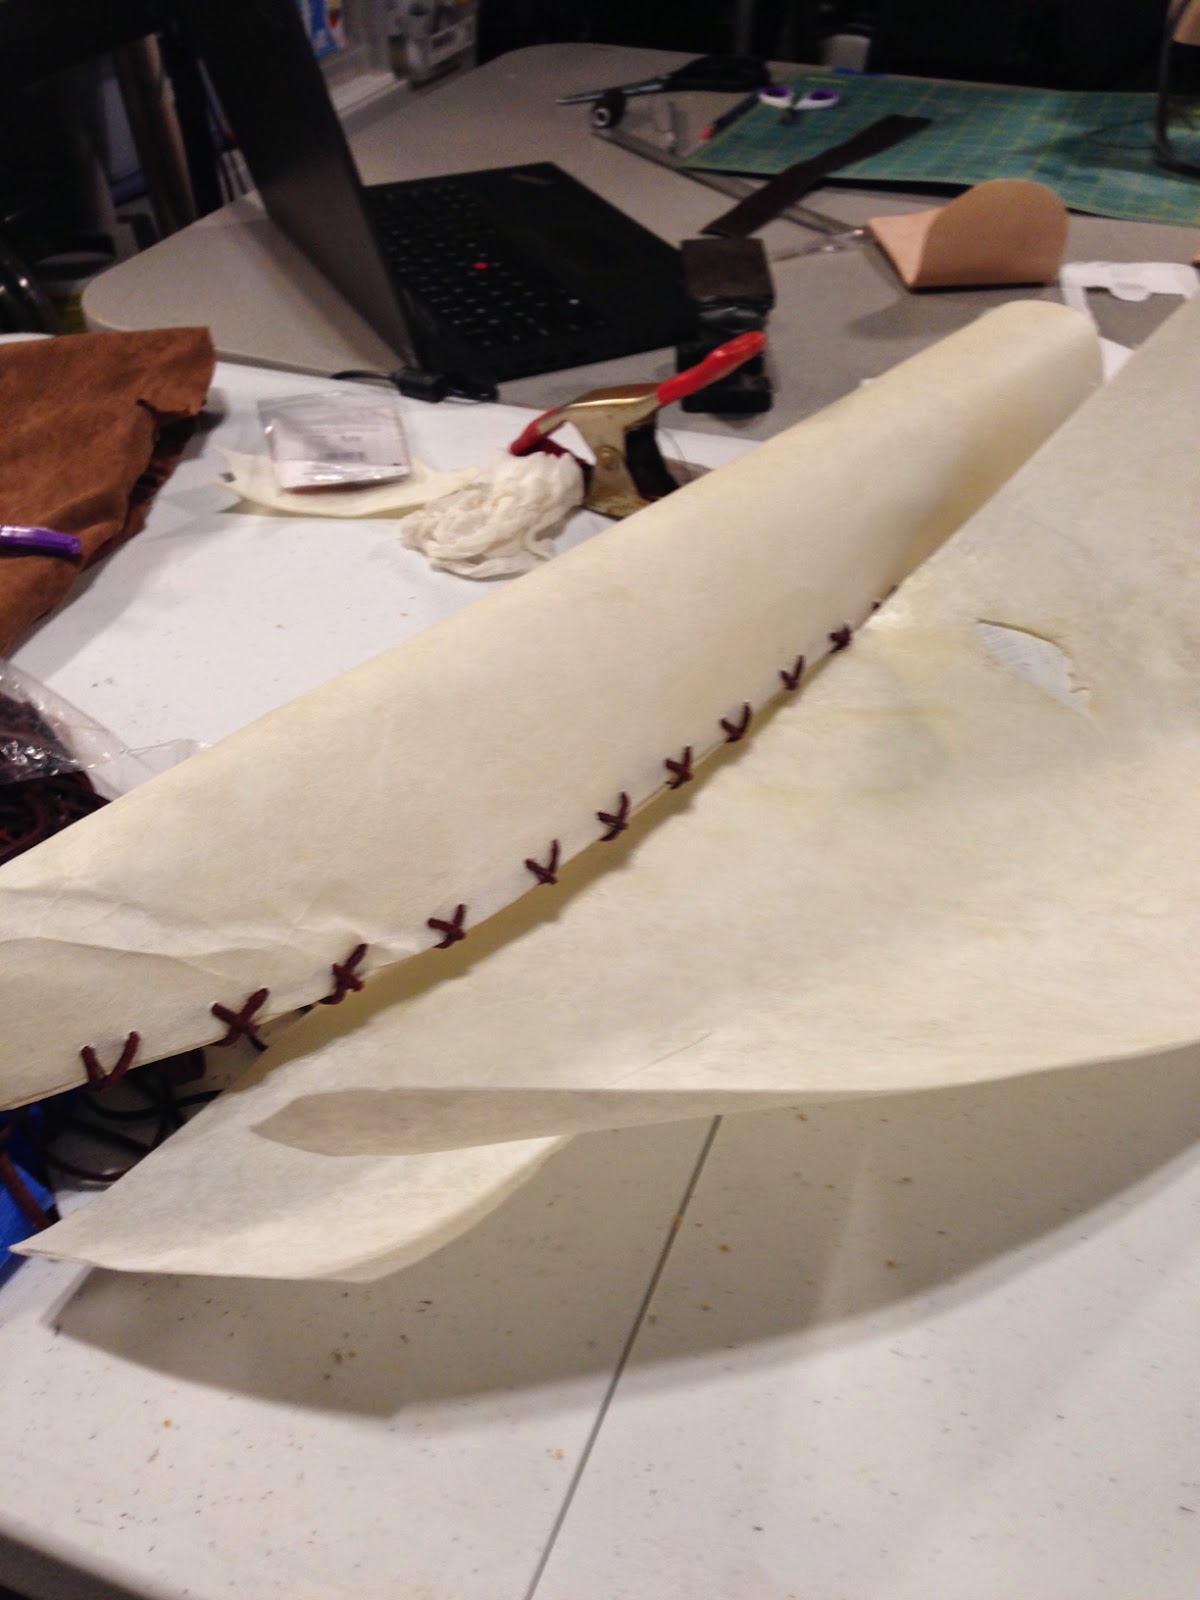
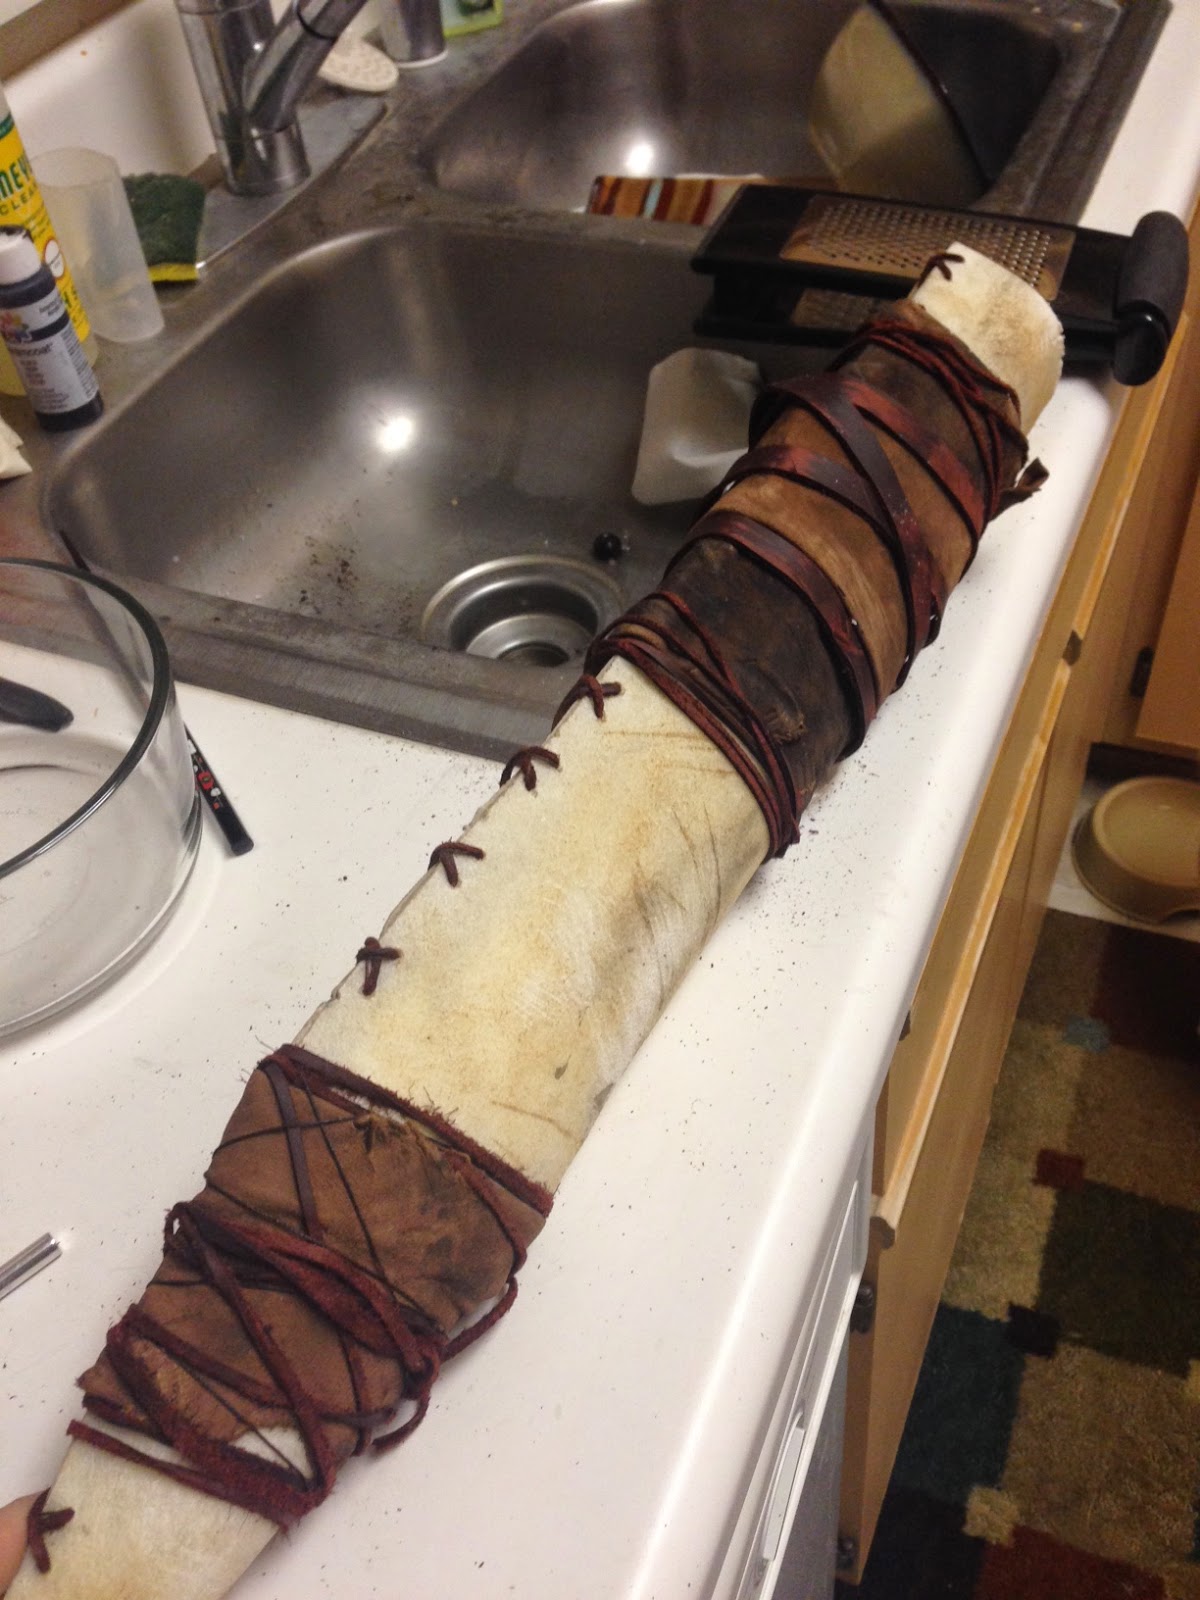
After the quiver has taken on a quivery looking
shape (yay!), it's time to start making it look like Lara's. Next we added the
soft glazed pigskin lining in the proper areas on the top and bottom. We folded
it before wrapping it to make it more three dimensional and add shape to it.
It's ok if it looks too light at this point because we will darken the bottom
layer with acrylic paint. I used 2 sided tape to secure these panels in place.
You can also use glues such as hot glue.
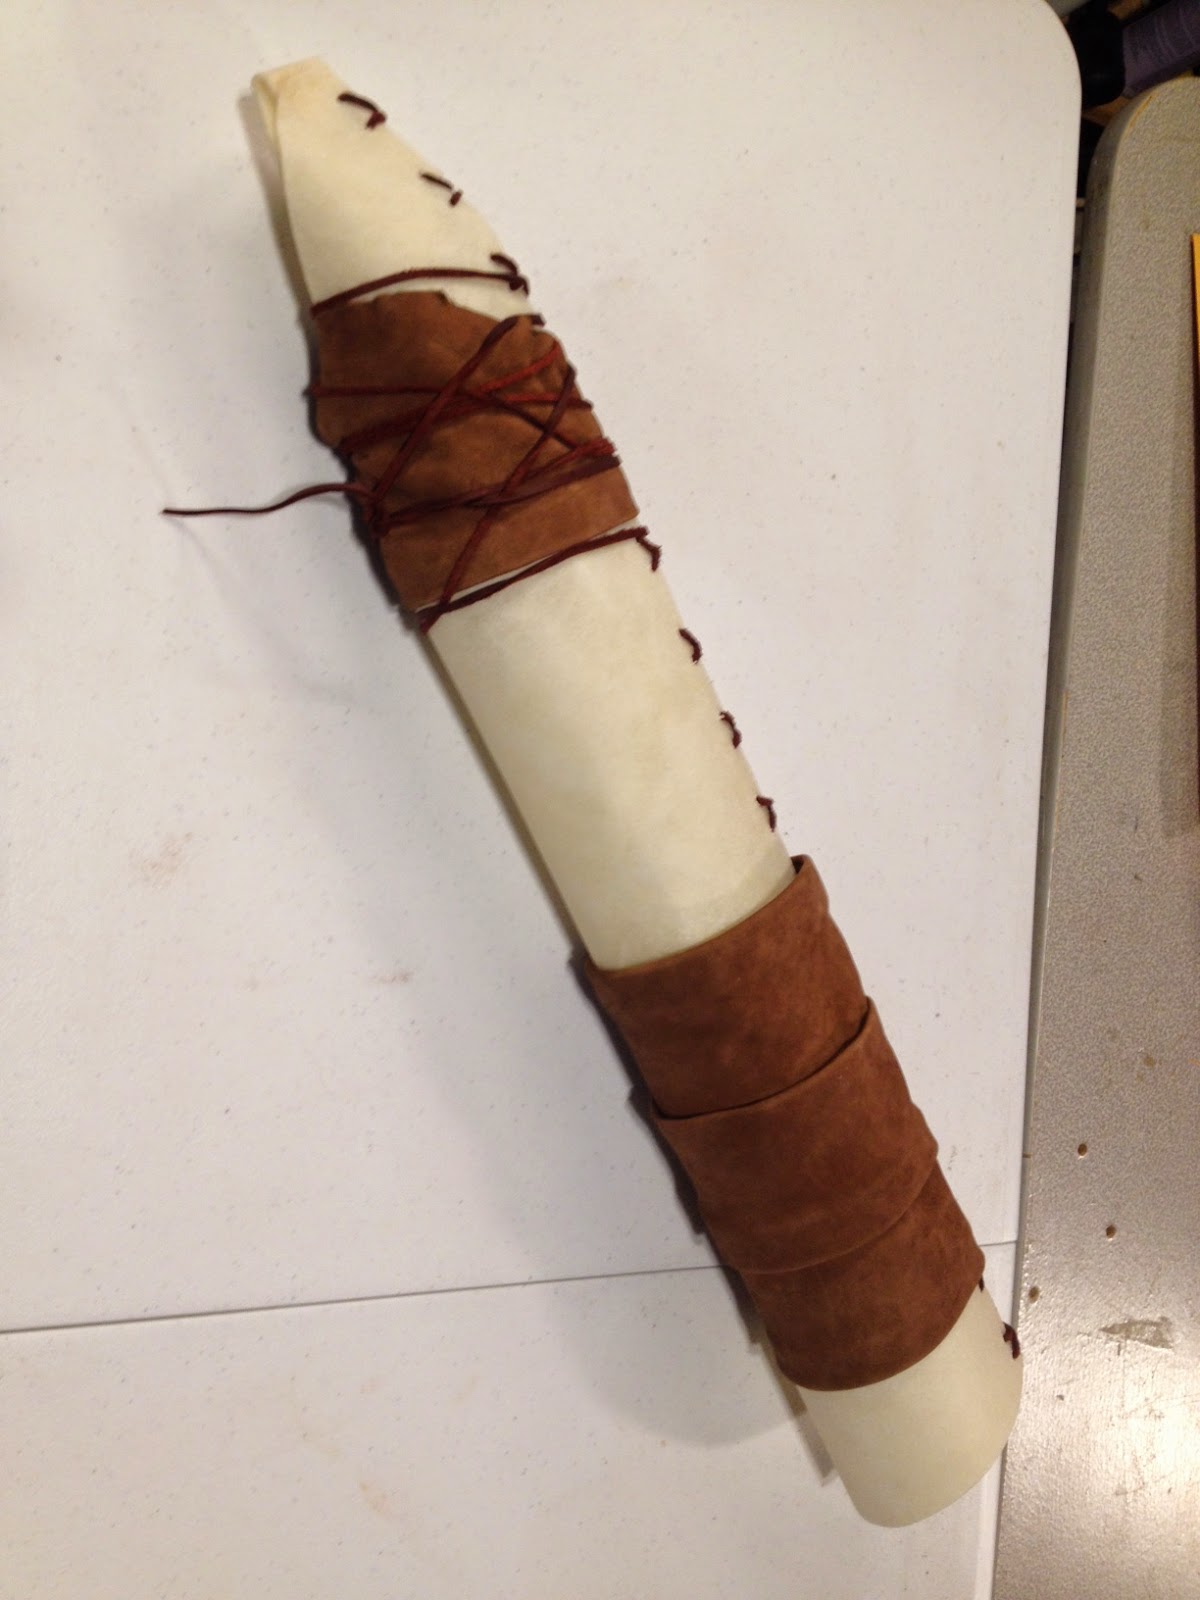
After this was done, it was time to start
distressing and darkening it. You can soak the teabag in some warm water for a
little while and then start using it to stain the rawhide a darker more aged
color. Mix your black acrylic with some water and use your natural sponge to
lightly dab areas on the pigskin and maybe a little on the rawhide too.
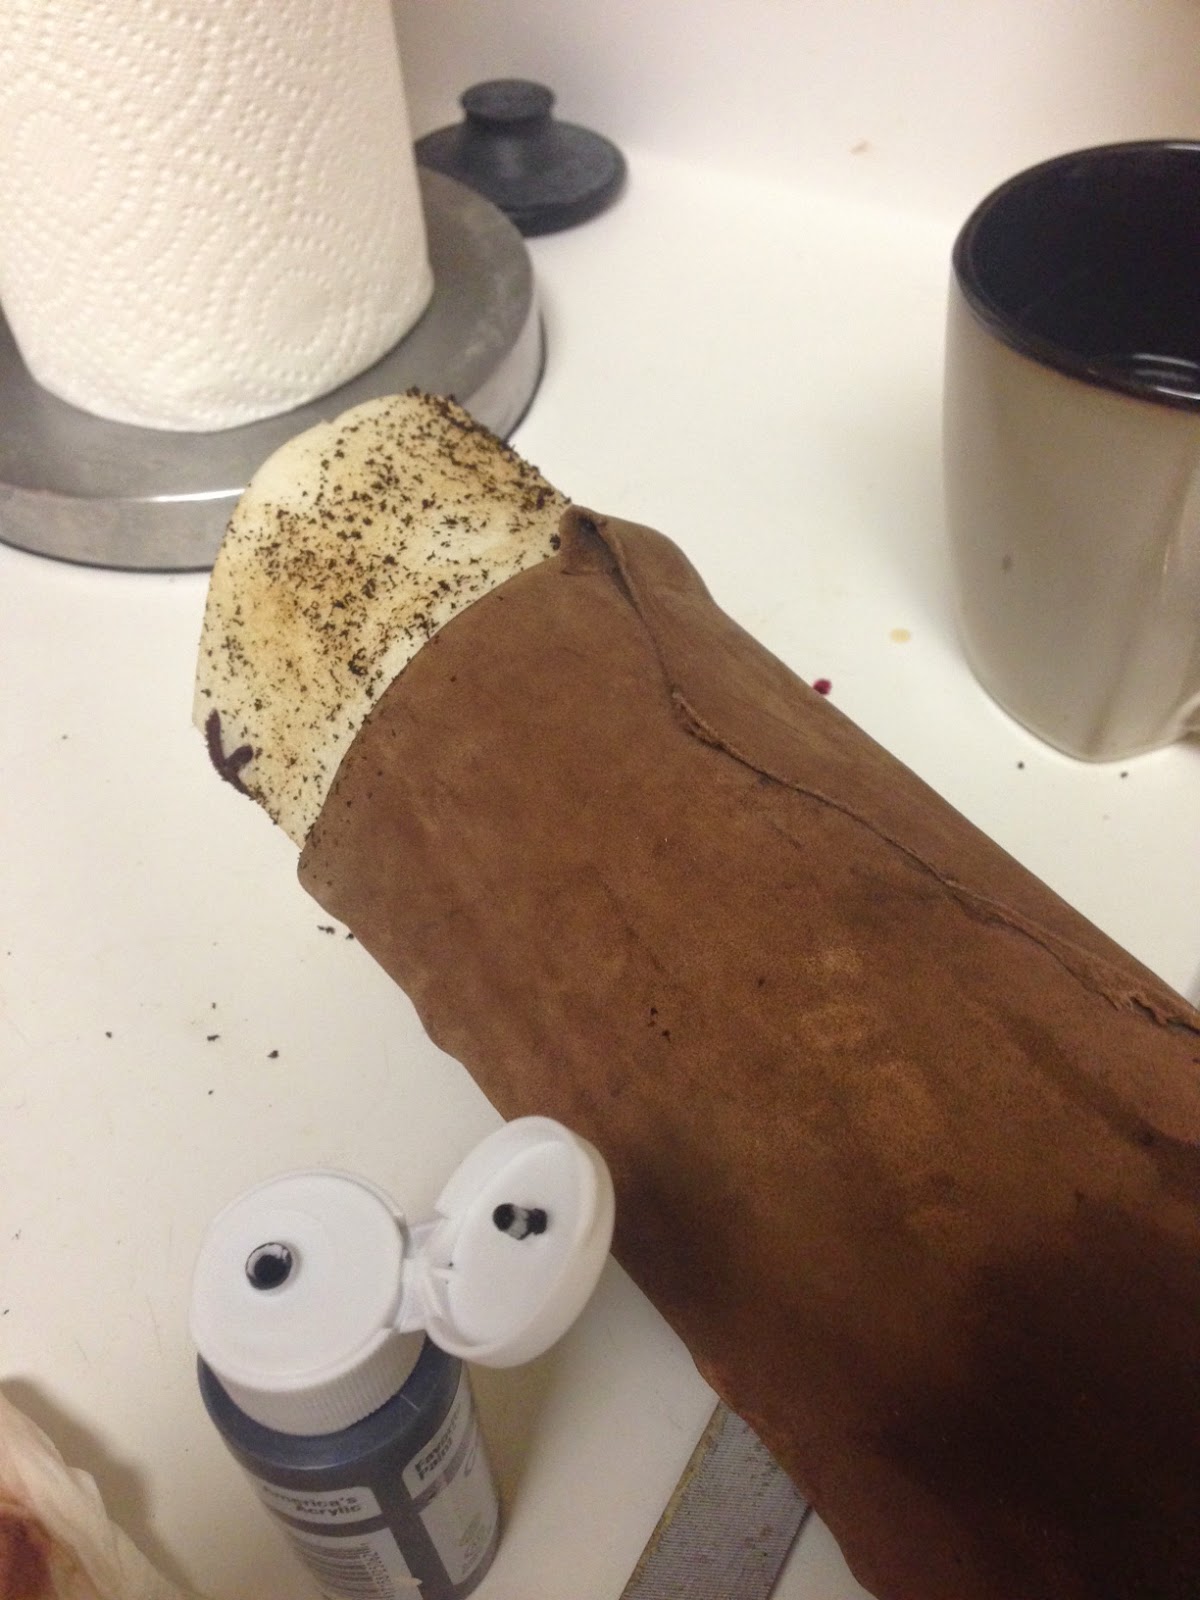
You can also make scratches and scuffs to add
to the battle damage.
Here is what the quiver looked like after I had
darkened the bottom layers of pigskin, stained with tea, sponged "dirt" onto the
rawhide, and added the straps. Notice how there is a lighter colored pigskin
strap on top of the darker pigskin? This is the natural color of the leather and
I just left it that way, adding a little dabs of the sponge to weather it a
bit.
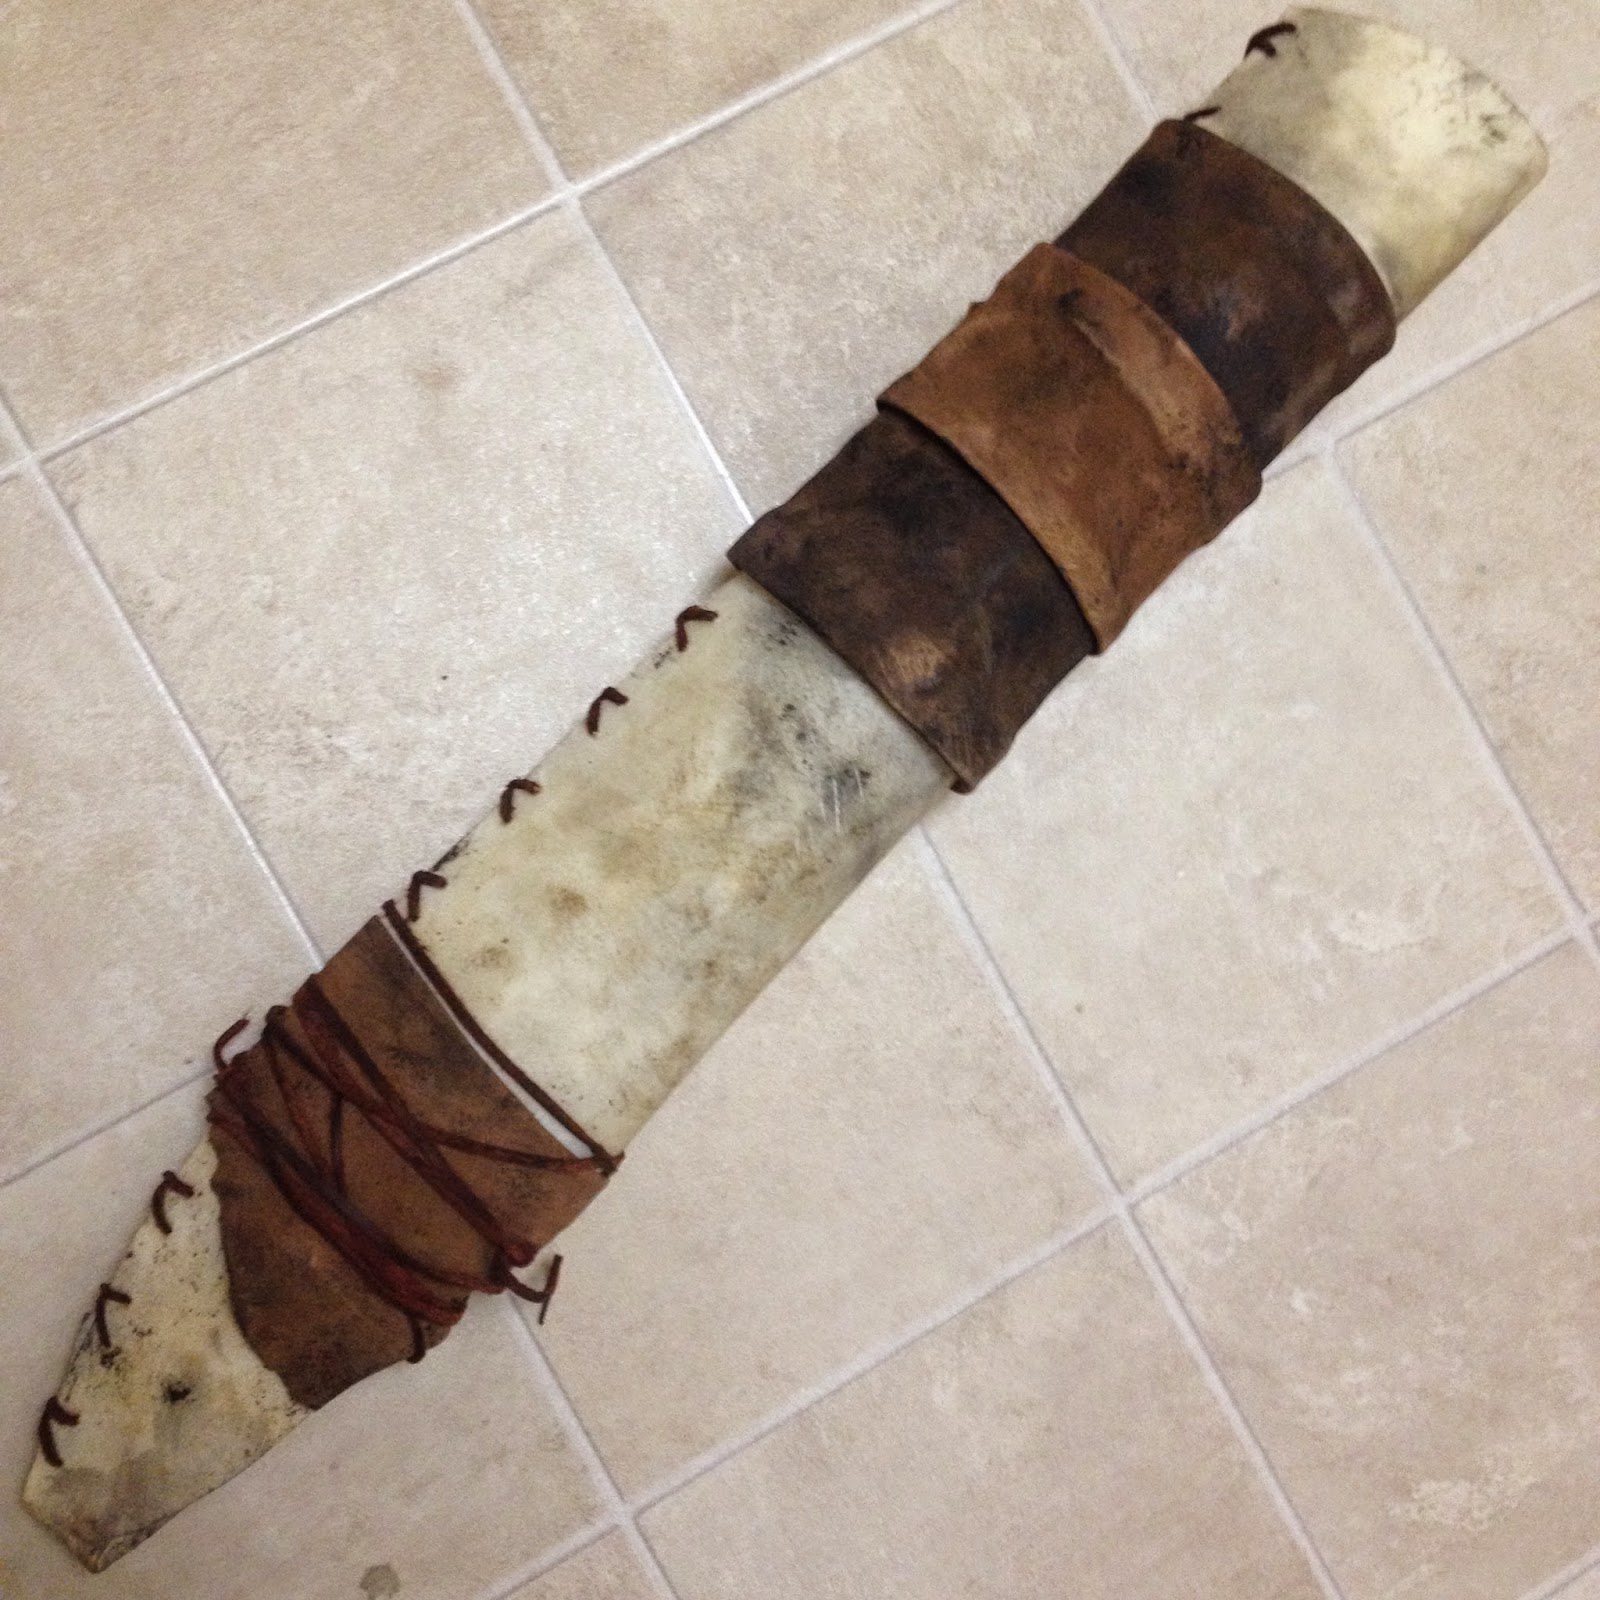
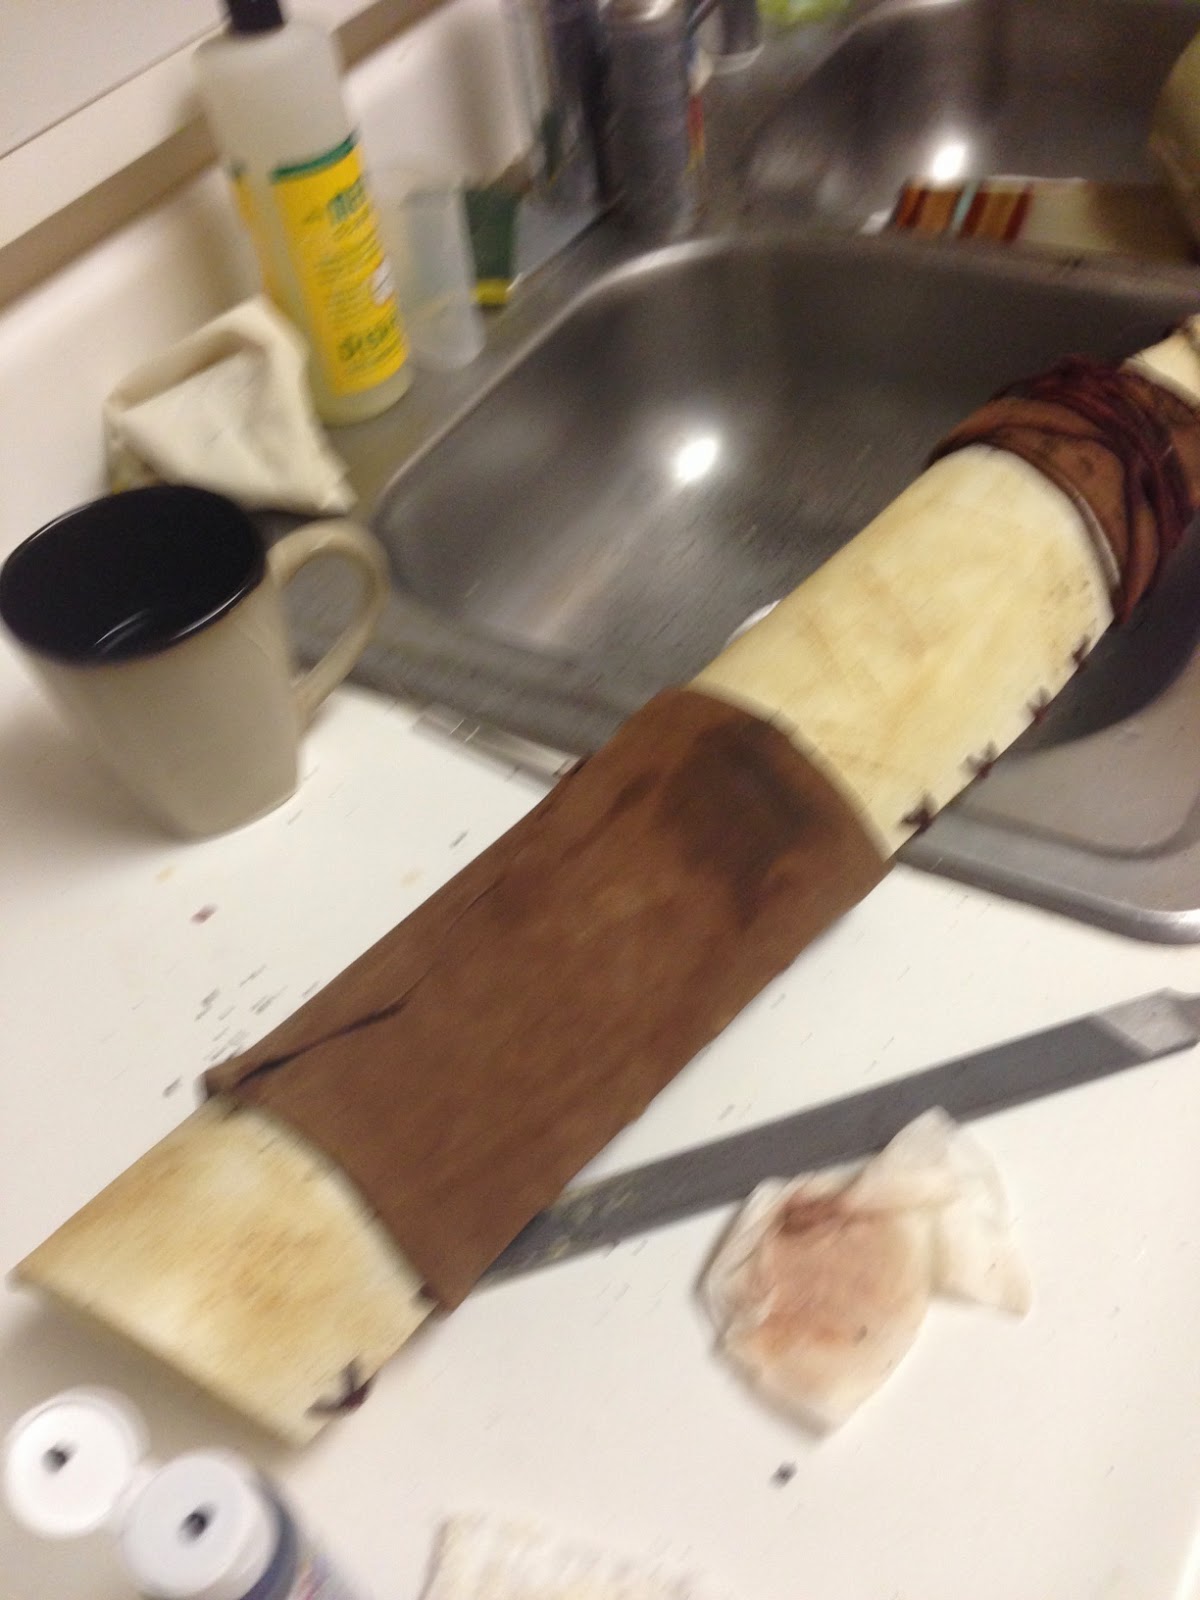
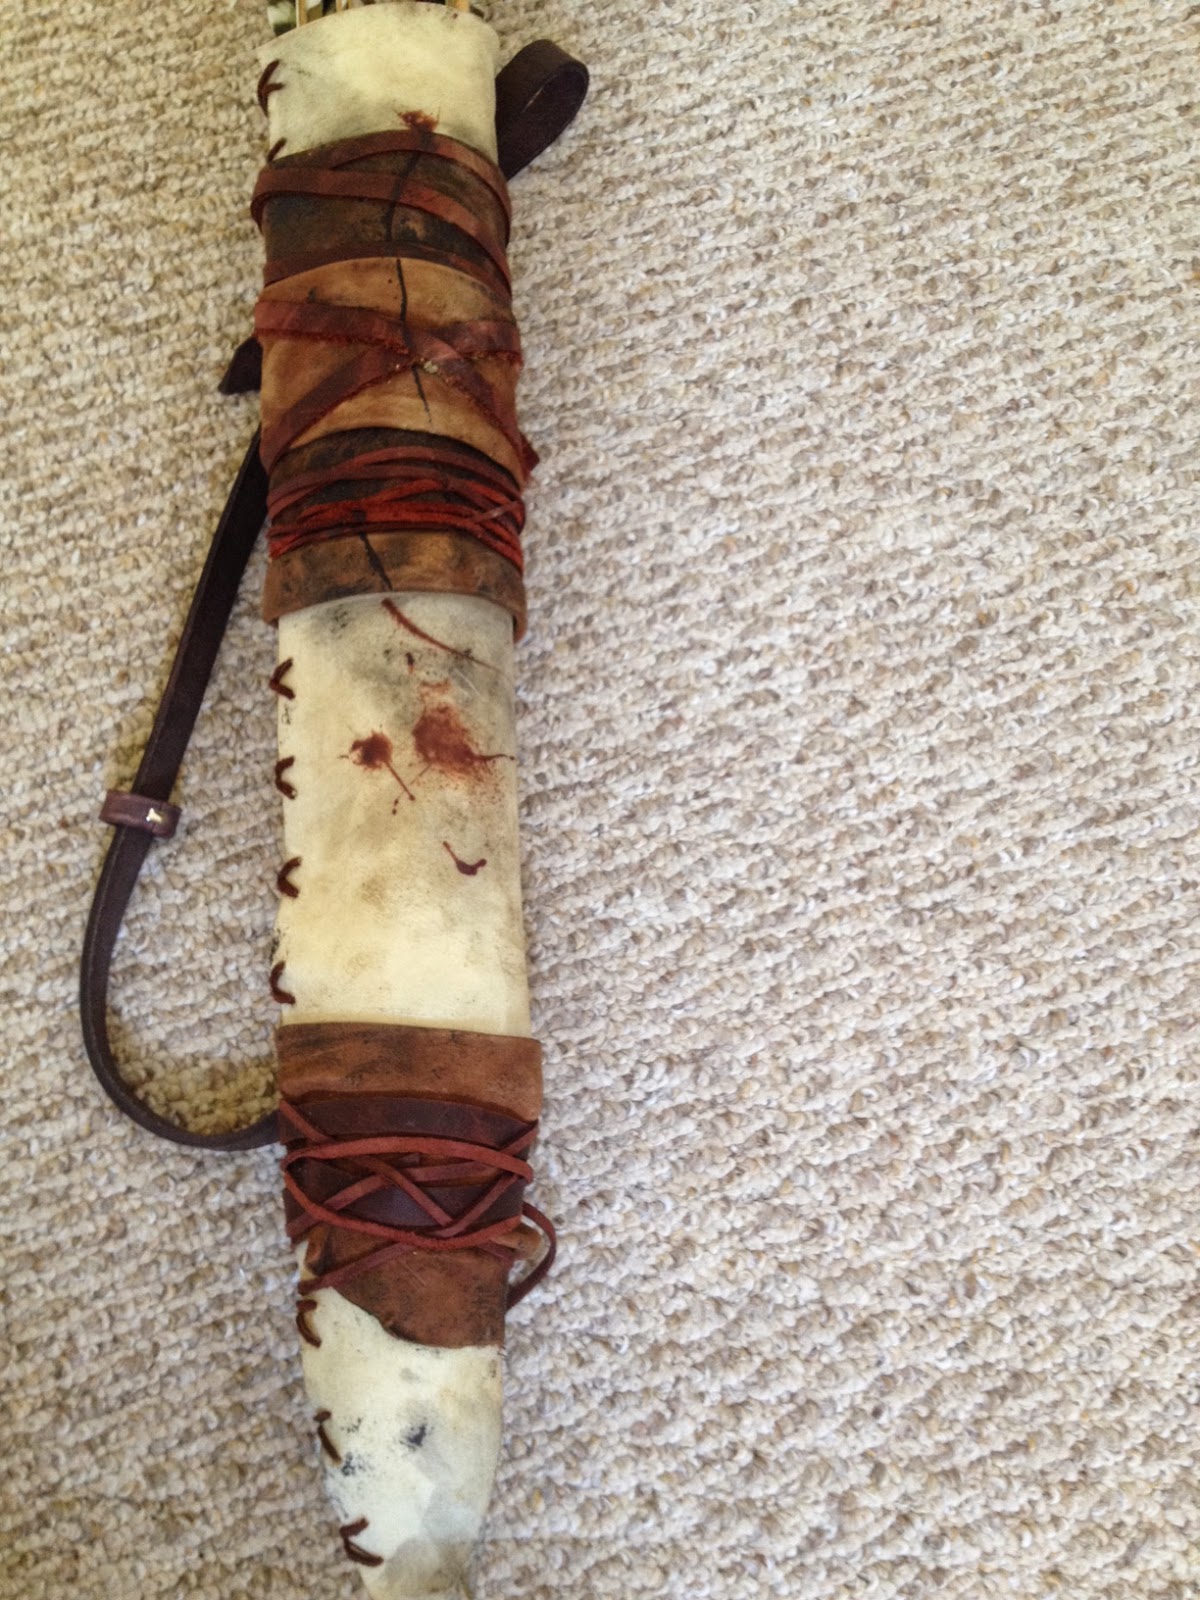
Here is what it looked like after I added some
fake blood to it and added the belt strap. Before I added it, I had to stain the
strap a dark mahogany. The dyes I got had to be mixed before being applied. I
used primarily dark mahogany with a little splash of dark brown mixed in. Then I
assembled the belt to the buckle, riveting it in place. I then attached the
strap to the quiver with rivets.
|