|
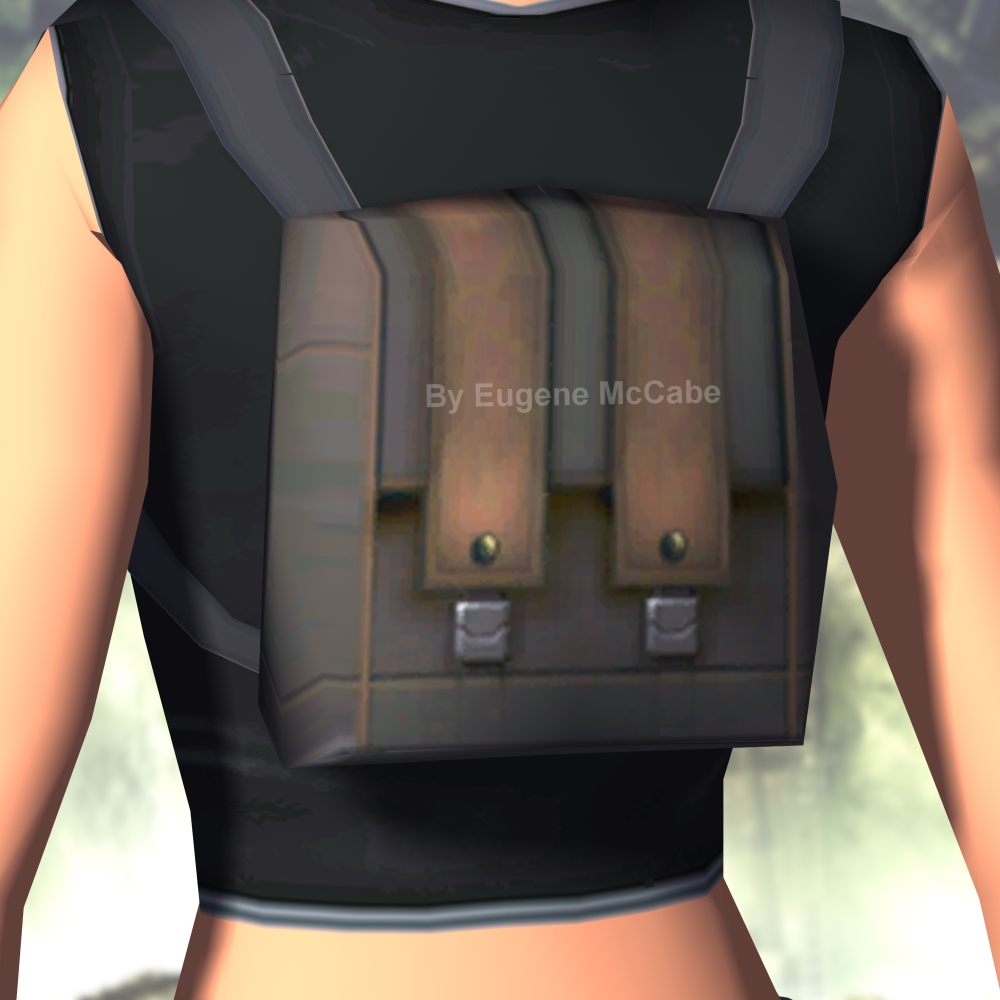
Reference pic:
 Hi cosplayers!, Well, I’m working on TRAOD
cosplay, so I’m attempting to make the TRAOD backpack, it’s simple, I promise. You will need:
- A4 sulfite sheet or something of your preference to make the patterns
- Brim, Cotton, faux leather or the fabric of your preference for the backpack
material
- Brown fabric (just a little piece for the backpack detail)
- Black and brown thread
- Silver duct tape for the details
My patterns are made based on my back measures; you measure yourself or your own or use mine as well. It’s up to you. First
you need to make the patterns and I did with A4 sulfite sheet and worked well.
To make the front part, take one sheet and cut like this:
 The part written as “A” has 16*21cm and “A1” has 5*21 cm, they are
cut like this to make the front detail, both parts makes the FRONT of your
backpack.
Then you will cut the back part, like this:

So, where is “C” is the back part, I made with 20,5*21 cm
Side part

You must cut 3 pieces of this one, cause they will compose the sides and the
bottom of your pack, 21*9cm.
The backpack cover:

Pattern has 21*12cm
Now you have the basic patterns (we will speak about the arm straps and cover
details later), we’re going to put this parts together first.
Now cut the fabric up based on your paper patters, and leave 1cm to 0.5 for the
seam.
I did it with
green fabric, because I didn’t have black, but later I painted it black (you
can do it too if you don’t have black)

I used old soap to draw on the fabric (for the patterns), it’s easy, later, wash
and it fades but you can use anything of you like.
After you cut everything, put all the patterns together in front of you and then
we'll put them together

First put the part A to A1, making the front of your pack with that detail
line.
look like this:

After you sew the side parts (B), making the sides and the bottom, then join
this new part with the “C” part, now you must join the back with sides and
bottom. (sorry I don’t have a pic)
Then you put all them together, (part “A,A1”
with “B parts” with “C part”).
I recommend you put some pins to help you on your way. Even my mom who’s a
professional in this area, uses the pins and
helps a lot.

Now it’s beginning to look like a Pack, you must have something like a little
sack. (Sorry no pic XD, I was kind of confused in this part, so I forget to take a pic xD)
But it is exactly how it should look, a little sack, then I put the cover in
“D” part
It will be the cover of your pack, join the “D” part to the back of your “C”
part (you will understand where it should be, to make the cover), don’t worry
about where the sewing is, it will be on your back, so it won’t show.
Now your little sack has a cover and it’s almost done.
The arm straps, you will make based on your measurements to make sure
you're comfortable. I didn’t made a pattern of this one, cause I cut
just based on the measures of mine with a metric tape.
If your case is that you don't have black fabric, now is the time to paint,
because the last part is brown, and you won’t be able to paint it all to black.
(Unless you got ninja skills for painting, haha).
I use fabric dye myself, here in my town I used the “Tupi”
mark, I'm sure you have black dye for fabric where you live.
Now that you have are almost done with the TRAOD backpack, let’s make the brown stripe.
Again, with A4 we do the patterns with 5*20cm
Cut patterns out of brown fabric, (if
you don’t have brown, you can use the paint technique like i did for my black
fabric), cut 4
parts, sew them together (leave one short side open) and turn to them inside out, join to the backpack with the “D”
part and you will have something like this:

Another option is to sew on the outside just for detail, to be honest, I
forget to do that and it was already joined in the backpack.
Now for the last
details: buckle, you will finally use the silver tapes
Cut them in the size that
fits your pack and it is done!

Final results with the silver tapes with pencil for the buckles details.
Hope I
helped you.
Anything you can contact me on:
Facebook:
https://www.facebook.com/jessicacroftcosplay
DeviantArt:
http://jessicaloyolatr.deviantart.com/
Email:
jessicacroftcosplay@gmail.com
Thanks! |