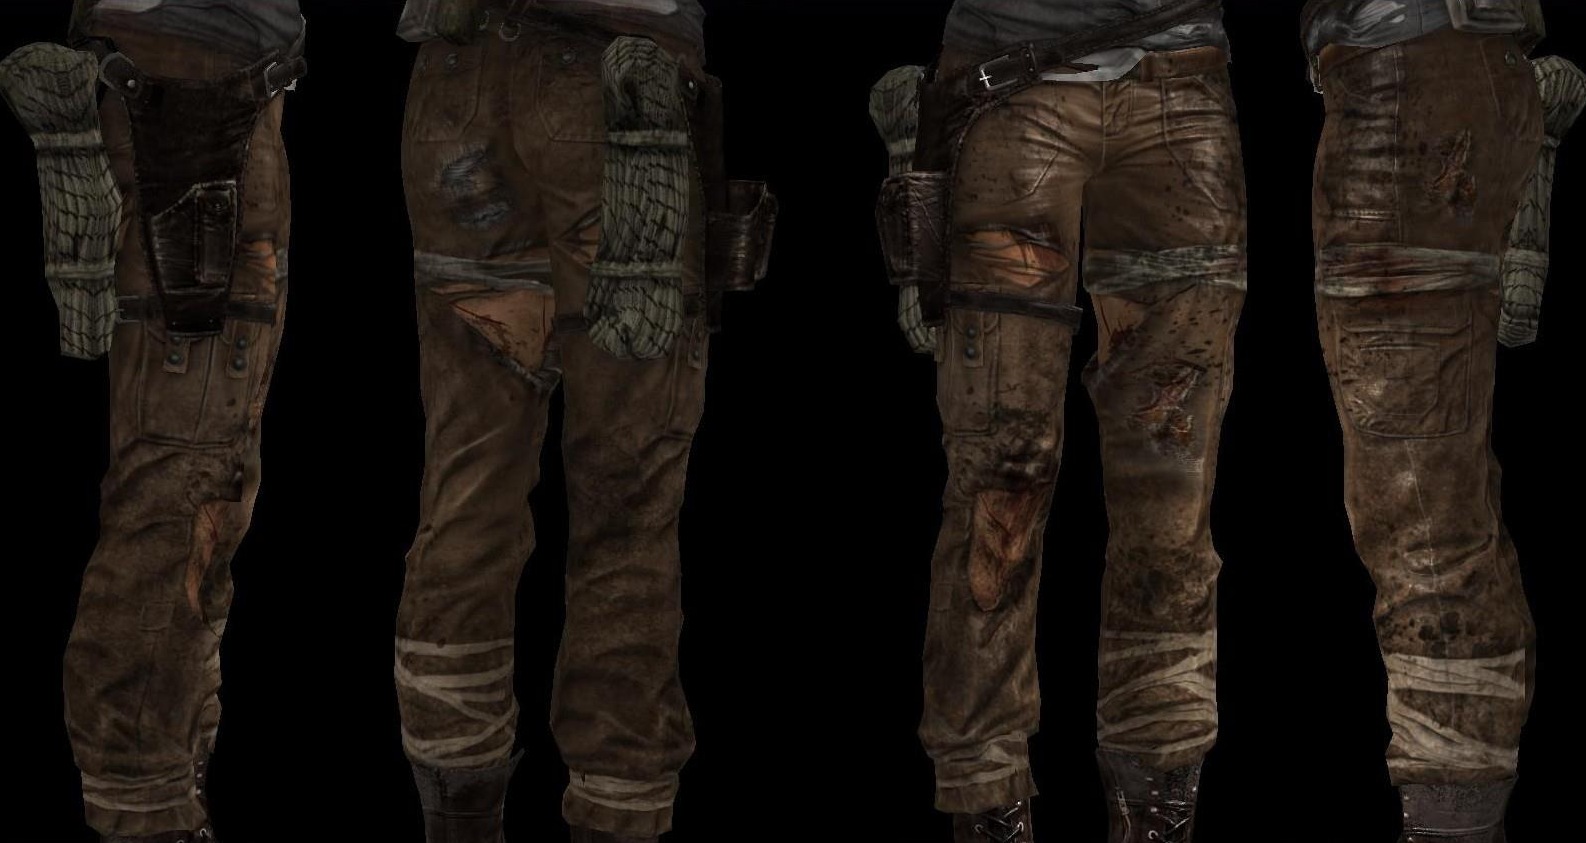
Reference Picture:
Click to enlarge pictures (opens new window)
EASY VERSION TUTORIAL:
ACCURATE VERSION TUTORIAL:
There are many parts to this belt, here i will show you how i made mine, i took progress pics as i was making it... What you will need:
Thick Cardboard
1 Yard of pleather (plenty but it will give you room for error
3 Small D rings
1 Medium D ring
1 centre bar buckle
Glue
Scissors
Thread and needle (brown)
Two decorative press studs
One magnetic press stud
This Diagram below shows you the main components broken down:
(Click to enlarge)
A = Back of the holster B = front of the holster C = Top (hip) belt D = Thigh belt E = 3 little D rings and their holders F = D ring for the hip belt G = Buckle
Lets start with, The holster:
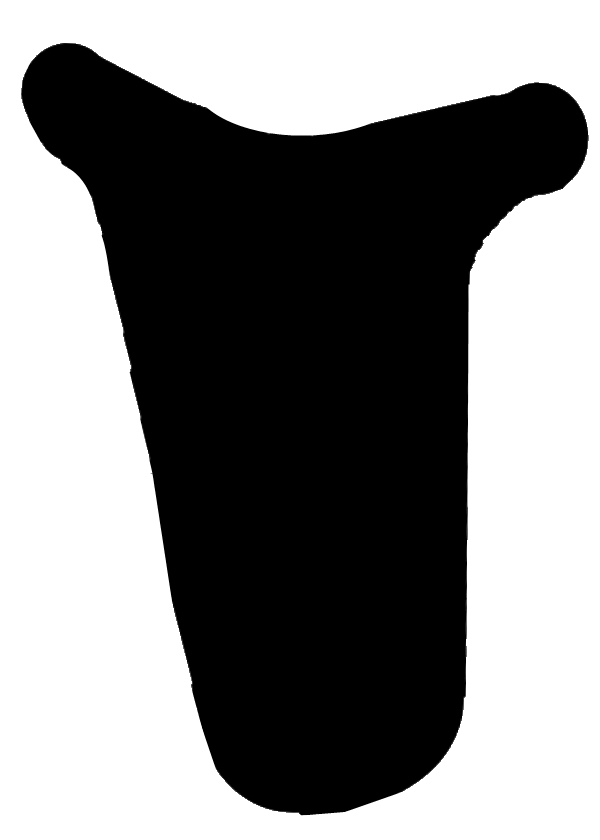
You will need thick cardboard, and you need to cut this shape out of it:
(Click to enlarge)
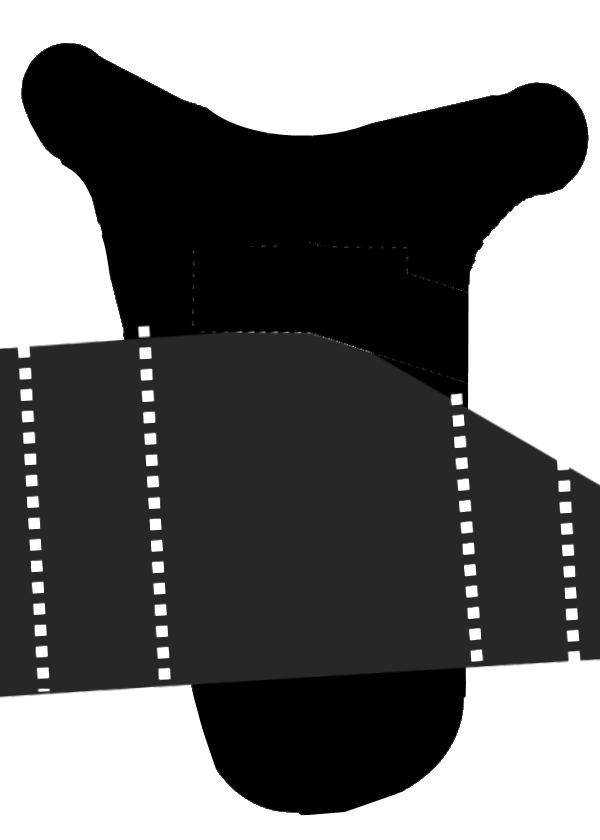
Cut two holes where the red dotted lines are: (Click to enlarge)
Then cut a piece of pleather that's about the same size , and cover the cardboard with it, i used all purpose glue to get good contact
Work the corners of it, make sure it's all taught, then cut down to the holes on the card, put it aside for now :)
Cut another piece of cardboard like this: (Click to enlarge)
The dotted lines represent where you will be folding it.
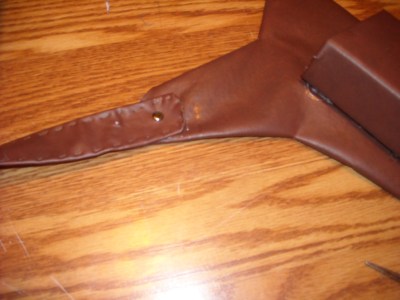
Start covering this holster piece just like you did with the back part, use all purpose glue until it looks like this:
When they are both dry, they will fit together like this, so the middle part will land just at the edge of the back part:
(Click to enlarge)
Attach one to the other like this, with glue, move and mold them till they fit perfectly then lock them down with a book or something for drying and place two small press studs on either end like this ^
The Main Belt:
I cut a piece of pleather that's about 2 inches thick and started sewing up the corners, here's a closeup of the inside sew both sides up, and slide the larger D ring up one side
To attach this belt , we're going to use effect rather than realism, so one end is very easy to attach, just use a press stud and glue like this:
The other side is a little bit trickier: I made a strap, that looks like an arrow, and sewed it like so:
then slid it inside the two holes we made earlier, making sure that you can see the centre bar buckle: then added a magnetic press stud to the back of that triangle
(This was from another bag, but i removed it so I could use it on my belt :) and the other part of the clap to the other side of the belt, so i can just click it on and off very easily, it looks like its buckled up but it isn't.
The Thigh Belt Do the exact same thing to the Thigh belt like so, meaning sewing the edges: This one is a little thinner: around 7/10ths of an inch
sew the smaller centre bar buckle onto it: on the side that's gonna be to the left of the holster
sew Velcro to the other end and the back of your holster for easy wearing and removal
sew the buckle end into the holster like so:
Now your top and bottom belts are done and attached, next is the Three D-Ring loops in the back.
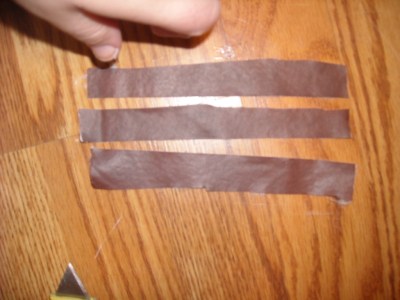
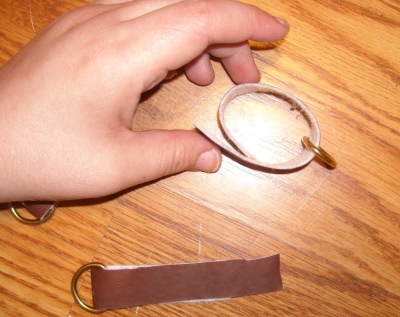
Cut 6x1 inch straps, three of them... Put the D rings through them then glue them into loops
After they dry, put them in your belt , at the back
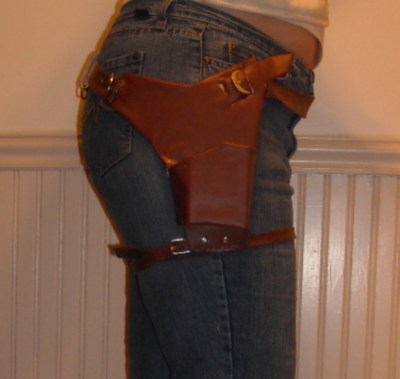
After everything is dry and ready , this is what it should look like: Click to enlarge!
Here it is on me :)
Then when you're ready for cosplay, we can add things to it that will make it look older and a little more worn
How to weather your belt and add the final details: