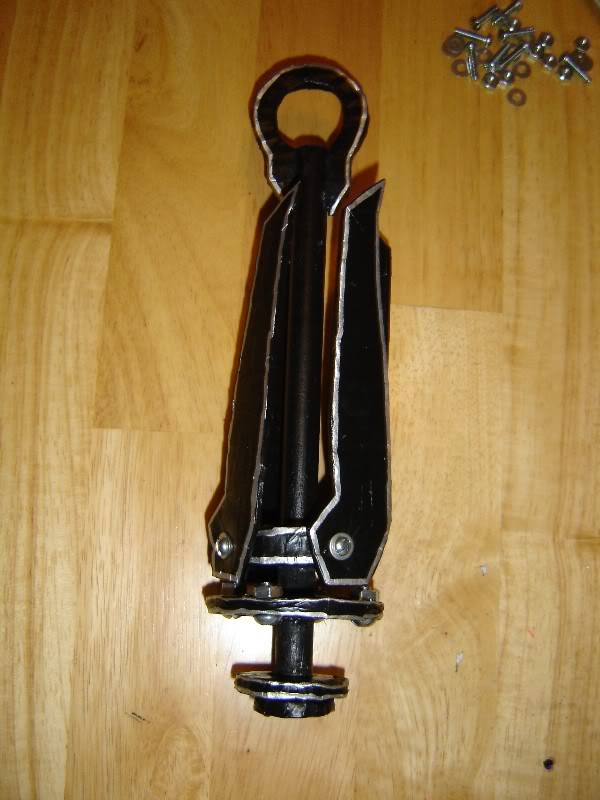
- cardboard, super glue
- hole punch, paint
- 9½ inch long dowel rod
- 4 machine screws with nuts (#8-32x3/4")
- 8 flat washers (#8 )
- 4 machine screws with nuts (1/4"-20x1/2")
- mod podge, newspaper
- copy of pattern
[PLEASE CONTACT US FOR PATTERN DOWNLOAD]
The pattern will need to be enlarged. (Photobucket shrinks all pics)
Enlarge the Entire pattern sheet so that the 'dowel rod sample' is 9 ½ inches
long. All other pieces will be to scale now. The small center circles should be
about the size of a penny.
Cut out 2 large circles A, 4 medium circles B, 2 small circles C, 2 extra
small circles D, 2 hooks E and 4 blades. (Cut 2 of the medium circles B with
slots, and 2 without.) With the hole punch, punch out the small holes in pieces
A and F.
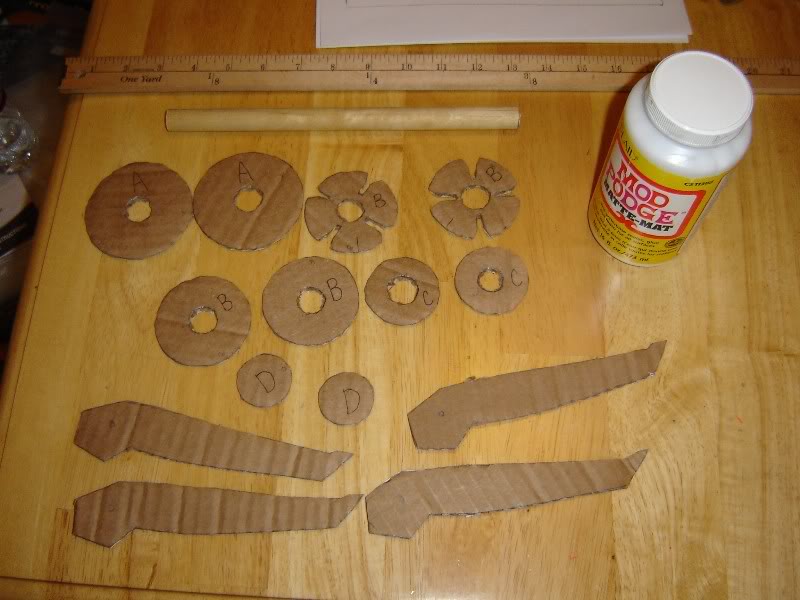
Glue together pieces A aligning the edges and center holes. ( If the edges
are a little off don't worry, this will be covered by the newspaper.
Next, glue pieces C ,D, and E to each corresponding piece, same as
piece A.

Piece B is a little trickier. First glue together the 2 slotted pieces, matching
the center holes and the slots. (It's very important that the slots are aligned
as close as possible) Now, glue 1 piece B (without the slots) to the slotted B
pieces.
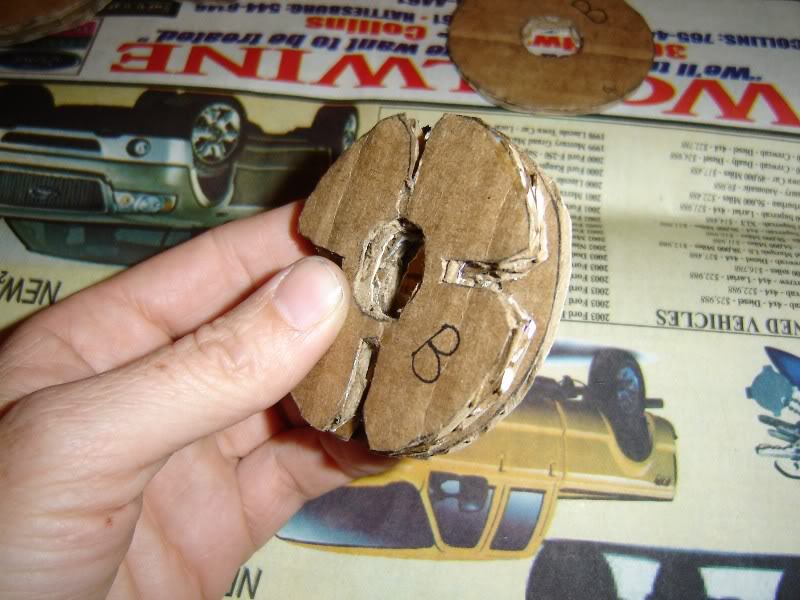
After this is dry, we add the small nuts.(#8 )
Glue each (#8 ) nut into the slot opening on piece B.

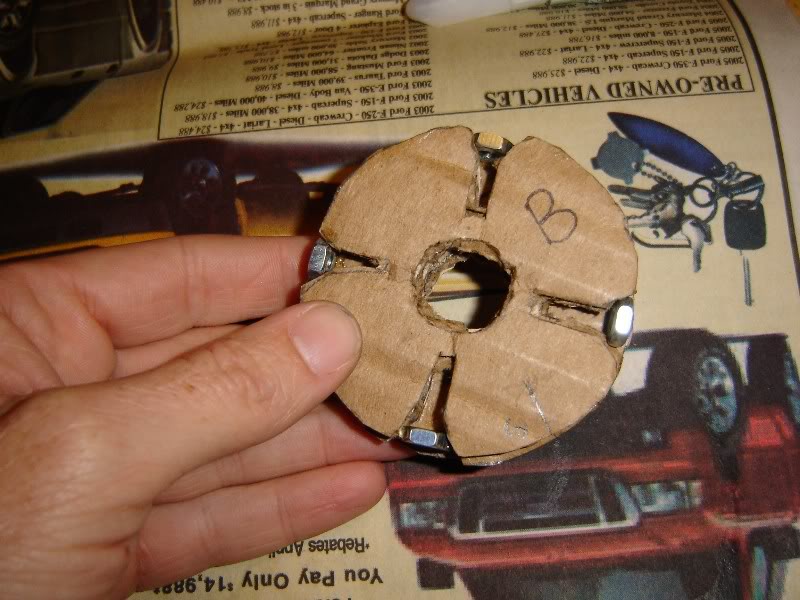
Now glue the other piece B(without the slots) to the other slotted piece.
Gluing the nuts to the cardboard allows the blades of the grapple to turn
freely.
Time to start the fun stuff.
Cut newspaper into thin strips. Wet a paint brush or your finger and dip it into
the mod podge. Paint the mixture on to the news paper strips and start layering
it on all the pieces. Remember to leave the nuts uncovered on piece B. It takes
several layers but make sure the pieces are completely covered.
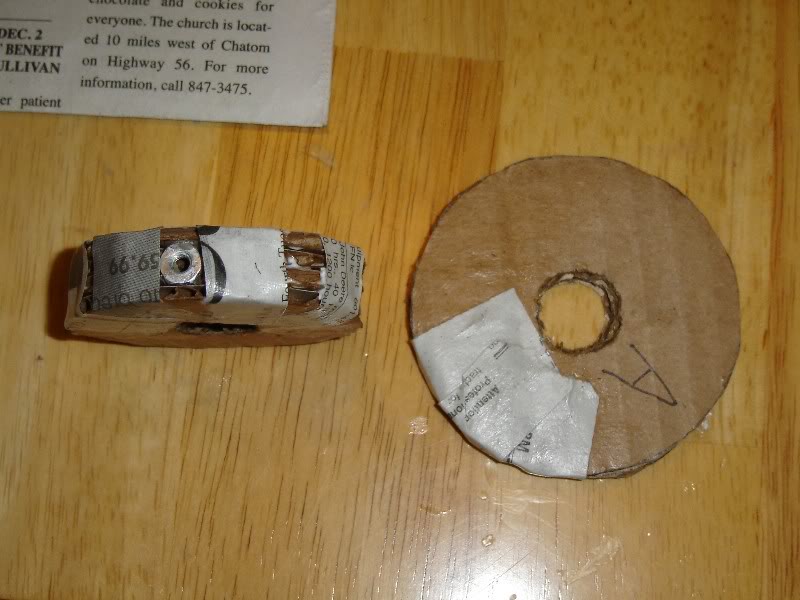

Tips: If the mod podge seems thick while applying it, wet your paint brush
again.
Be sure to clean your paint brush often especially if you stop between layers.
Once the mod podge dries the brush is finished.
Mod podge is messy. But it cleans up easily while it's wet. If you get it on
your skin, or are using your finger to apply it, it will peel right off after it
dries.
When the mod podge is dry, you can paint the pieces.
After the paint is dry, brush on a coat of mod podge, this will seal the paint
and give the pieces a nice shine.
Pieces should look like this:

Now time to assemble it.
Slide all the pieces on to the dowel rod. Glue pieces C and D to the end of the
dowel rod.
Before gluing pieces A and B make sure the holes are not aligned.

For the blades
Place a washer on one of the #8 screws. Insert it thru the hole of a blade, then
add the next washer.
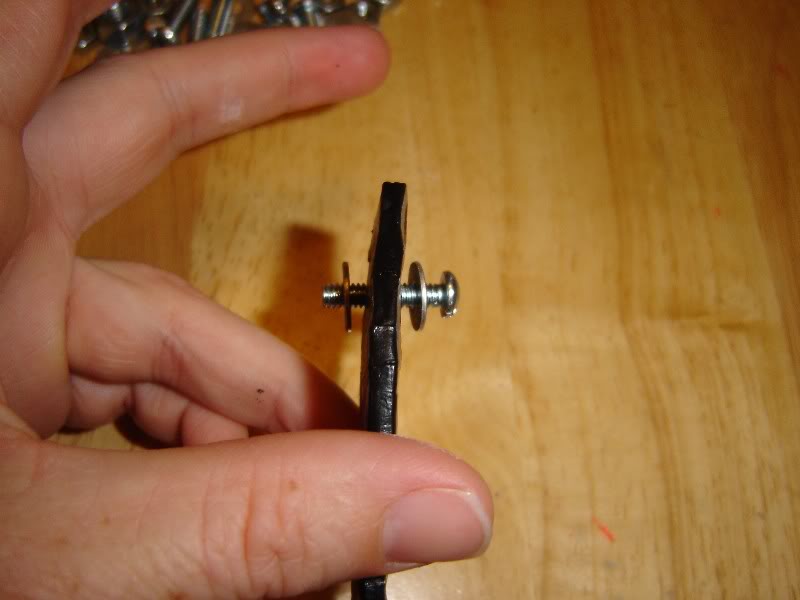
Repeat with the other three blades.
When the glue is completely dry on the main part of the grapple, you can add
the large screws. Push the screws up from the bottom of piece A and add the
nuts.
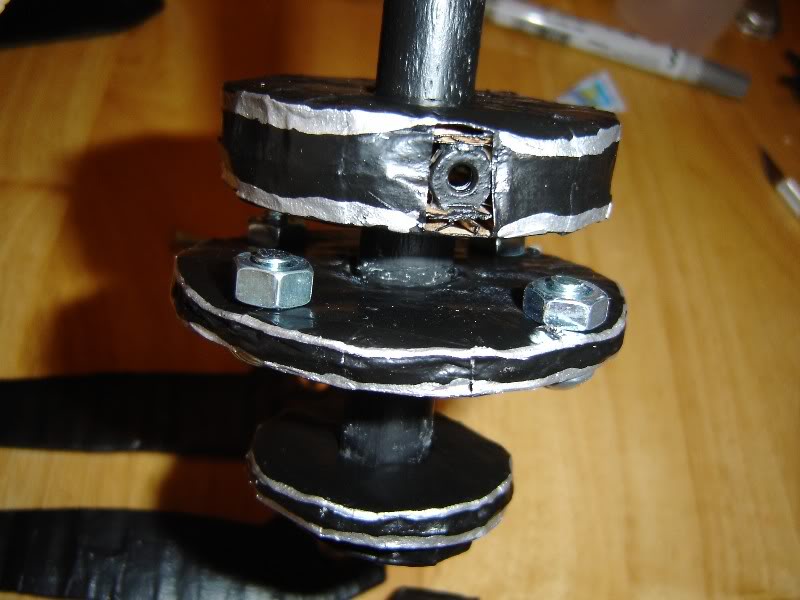
Now add the blades, and you're Finished!

