|
| How to make the Tomb Raider 2 Dagger
of Xian by Stella!... |
|
When I began this project, my plan was to kill two birds with one
stone. . . er, knife. ;) I wanted to create something cosplayers
would find useful but also a piece I could enter in the
Tomb Raider "By Hand" contest on the Eidos forum. For my first
time working with paperclay, I think it turned out pretty well. If
you try the project yourself or just have suggestions on how it
might be improved, I'd love to
hear from you.
By the way, in case anyone is still puzzling over the pronunciation
of "Xian," it's "shee-an". You can hear it spoken
here and
here.

Finished Dagger of Xian prop
Materials and Tools Needed:
- 3/16-inch-thick foam board (about a quarter of an
18"x24" sheet)
- Cardboard tube about 1 inch in diameter
- Paperclay (I used about half an 8-ounce package)
- White glue
- Super glue
- Masking tape (not pictured)
- Black duct tape (optional, see
step 29)
- Red and black (or black-and-gold) ribbon
- Spray paint and/or acrylic paints � Any color primer,
metallic silver, metallic gold, gloss red*
- Brown or black ink (or acrylic paint)*
- Clear polyurethane spray (optional but recommended if
you're using acrylic paints)*
- One 1-inch diameter glass marble**
- Two 1-inch long teardrop-shaped purple rhinestones**
- X-Acto knife
- linoleum cutter with interchangeable blades (shown in
step 15, optional but recommended)
- medium-grit sandpaper
- hot glue gun (optional, not pictured)
NOTES: For this project I used paperclay because it's
light but very strong and only needs to air dry. No baking is
required. Also it's fairly easy to sculpt both wet and dry, and it
allows you to add layers and fill in cracks with new clay even after
it's dry. If you plan to carve the dry paperclay, as I do here, I
recommend using a linoleum cutter with a variety of blades, but you
can also use an X-Acto knife, provided the blade is sharp and you
work carefully.
*I used spray paints for the main colored elements and added
detail with brown ink once the undercoat was completely dry. You
could use all acrylics if you prefer, though you'll probably want to
clear-coat the finished dagger with spray-on polyurethane to make it
look shinier. If you do go for the spray paint, you'll only need a
little bit of each color. So you might want to choose smaller cans
than I show here. I borrowed these paints from work. ;) Also, if you
can find a red glass marble, then you won't need the red paint.
**If you can't get a large marble and/or gems for the pommel and
dragon's eyes, you can sculpt these parts from paperclay or polymer
clay, paint them and then apply a high-gloss clear coat to make them
look shiny.
If you're having trouble finding any of the materials, check our
Shopping
Links page.

Materials
Reference Images:
I plan to add pictures to the TR2 reference section soon, but
meanwhile here's a sheet with a few dagger images if you need them.

The Dagger of Xian from Tomb Raider 2
Process:
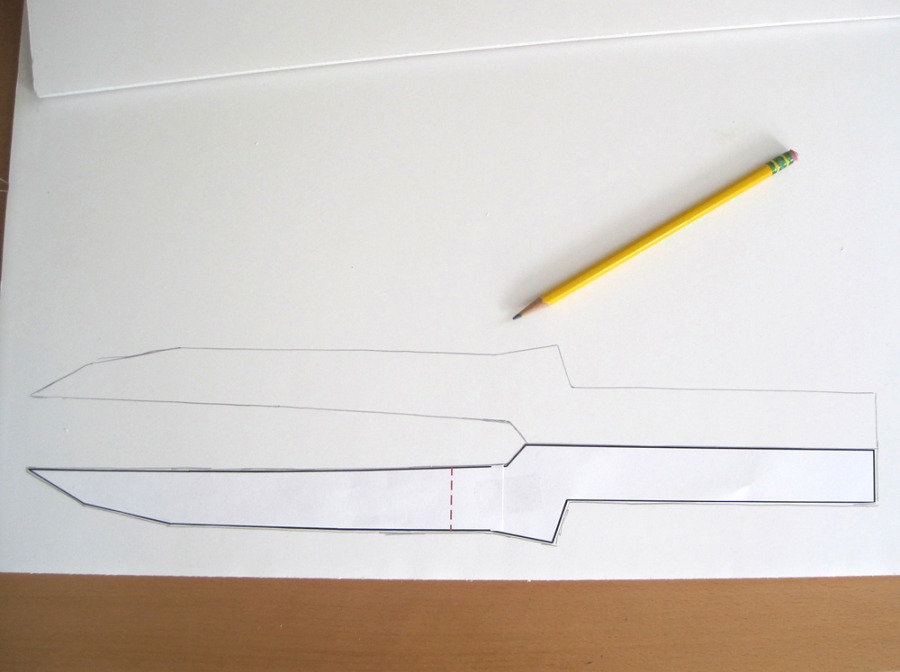
- Print out the dagger template
here. The whole template is about 17 inches long and
won't fit on a typical sheet of paper. So I've divided it
into two pieces. Cut out both pieces and put them together
so the red dashed line overlaps. Then tape the pieces
together to form the complete dagger shape.

Step 1
- Trace the dagger template onto the foam board. You'll
need two (2) of this shape. Note that the handle portion
should be as wide as the inside of your cardboard tube, so
you may need to adjust the template slightly. My tube is 1
1/8 inch in diameter.
Step 2
- Use an X-Acto knife with a sharp blade to cut out the
two dagger parts. You can use a metal ruler to guide your
knife. Just make sure you cut on thick cardboard or a piece
of junk wood so you don't accidentally slice your table. ;)

Step 3
- Check to make sure the handle part of each foam board
dagger fits snugly into the cardboard tube. If it's too big,
slice off a little bit to make it fit.
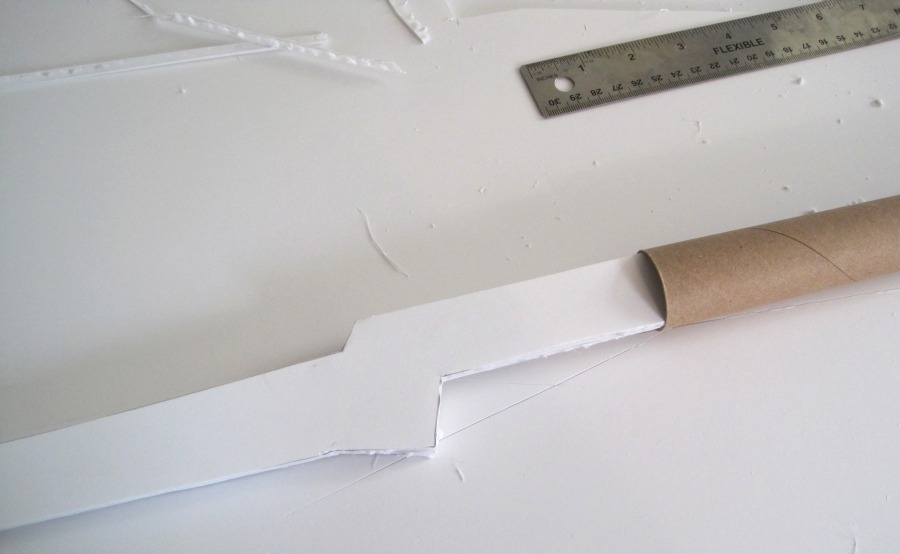
Step 4
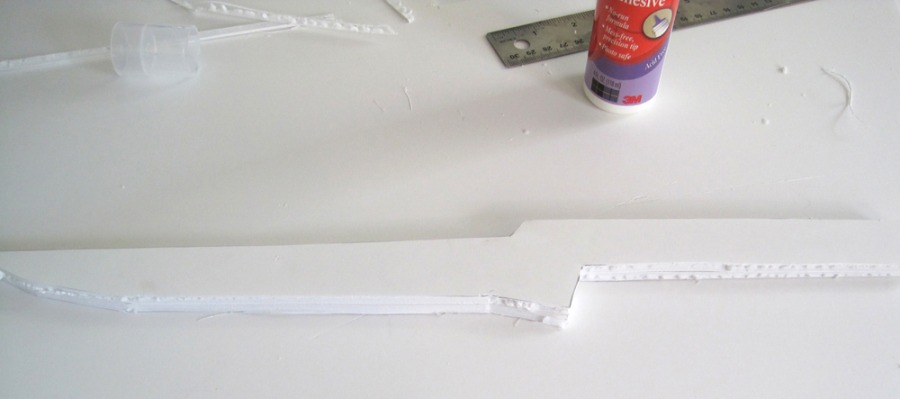
- Apply white glue to one side of one of the foam board
dagger pieces and place the other piece on top so the edges
match. Press them together so you have a double-thick foam
dagger.

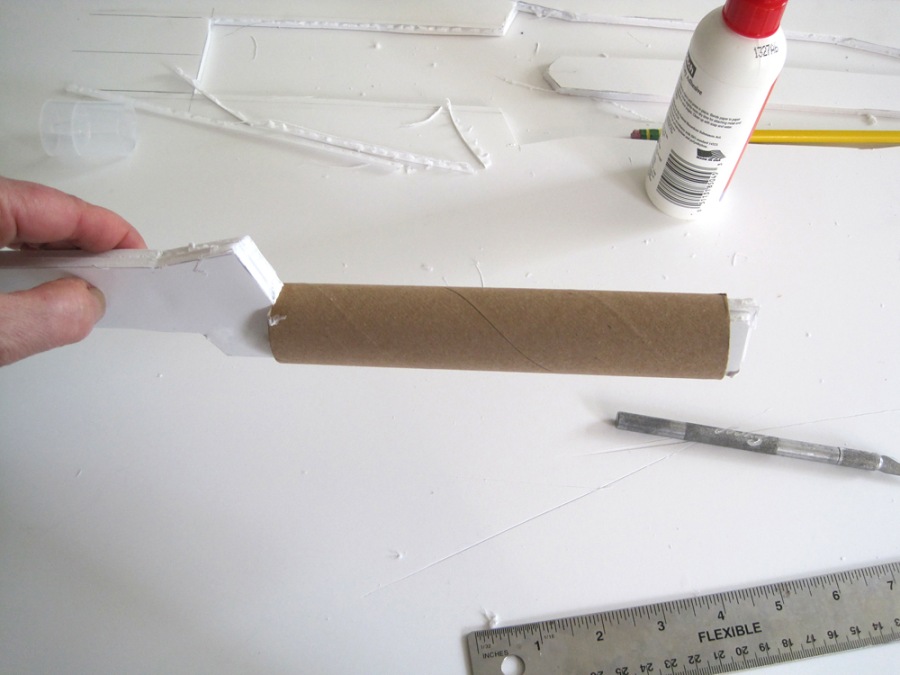
Step 5
Step 5a
- Use your X-Acto knife to trim the cardboard tube so it's
a little longer than the handle part of the foam
dagger�about 6 1/4 inches if you're using my template. You
want the foam board handle to go almost all the way through
to the end of the cardboard tube.

Step 6
- Apply white glue to the top and bottom edges of the
handle of the foam board dagger.
Step 7
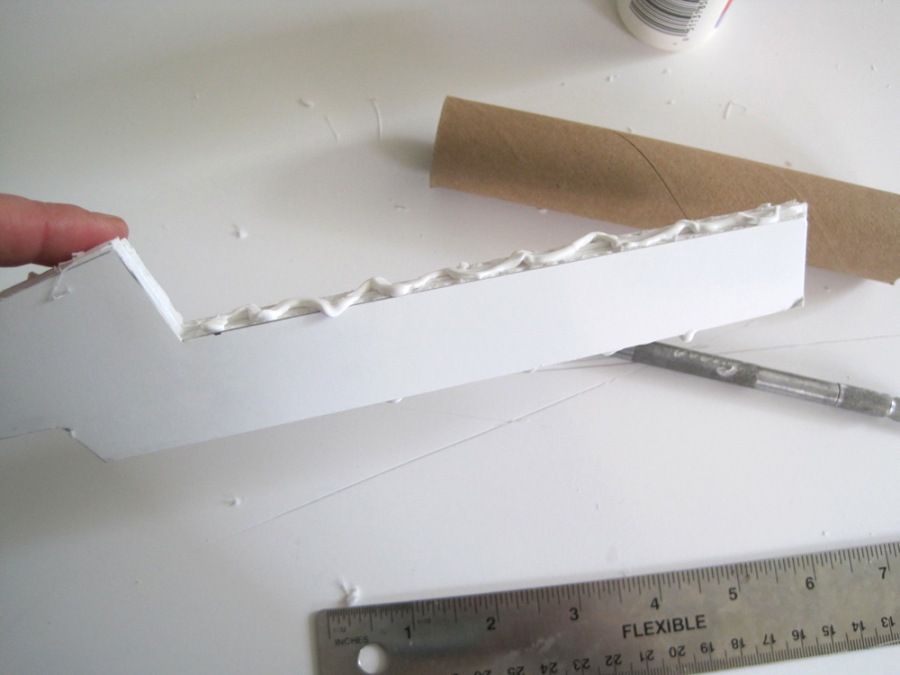
- Insert the handle into the cardboard tube. Some glue
will ooze out. Wipe it off if there's a lot of excess, but a
little extra glue is fine as it will help keep the handle
anchored inside the tube. Let it dry completely before going
on to the next step.
Step 8
- Use medium-grit sandpaper to smooth the edges of the
blade. This will help hide the seam between the two pieces
of foam board. Here I left the top edge flat but beveled the
bottom edges slightly to resemble a real blade. Don't worry
if the foam crumbles a little. You can fill it in later with
clay.

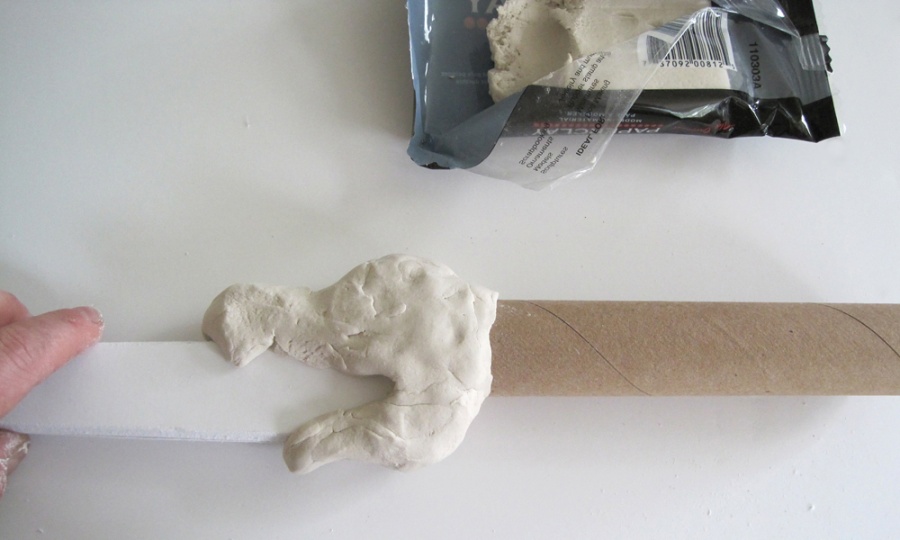
Step 9
- Now it's time to sculpt the dragon-shaped guard. Pull
off a chunk of paperclay and shove it into the space between
the cardboard tube and the foam board dagger. Extending the
clay up into the handle helps anchor it and makes the final
project sturdier.

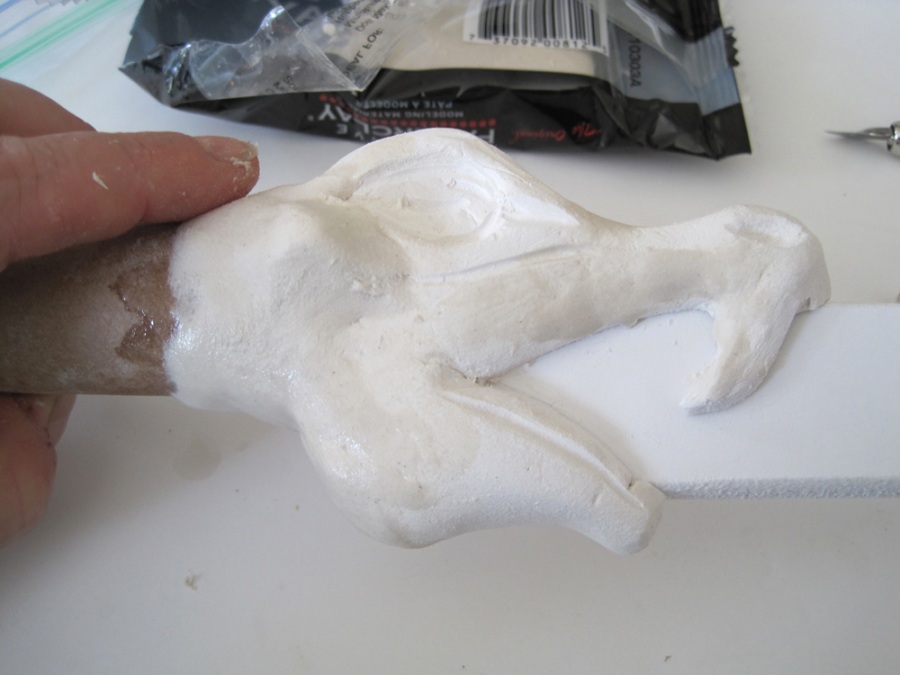
Step 10
- Add more clay, building up the dragon's head shape
around the blade as shown here. Sculpt as much detail as you
can in the wet clay. It doesn't have to be perfect. You can
carve it out and add more clay later. I'm not much of a
sculptor, so I did most of my carving after the clay was
dry. But if you feel comfortable working with the wet clay,
by all means do.
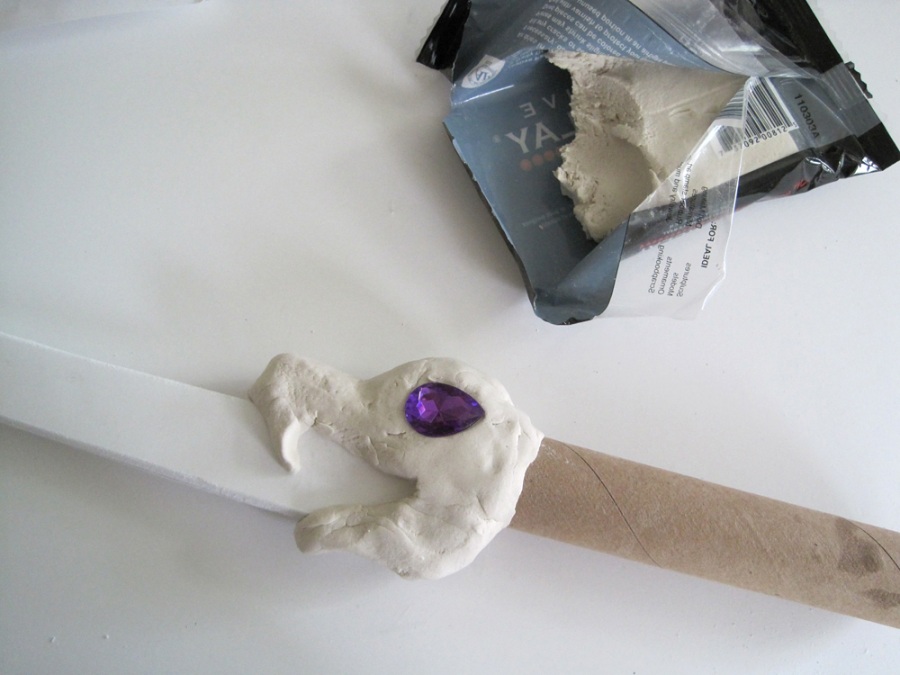
Step 11
- Press the purple gemstones into the moist clay where the
dragon's eyes will go. Then remove the gems and set them
aside. You just want to make impressions where you'll glue
the gems later on.
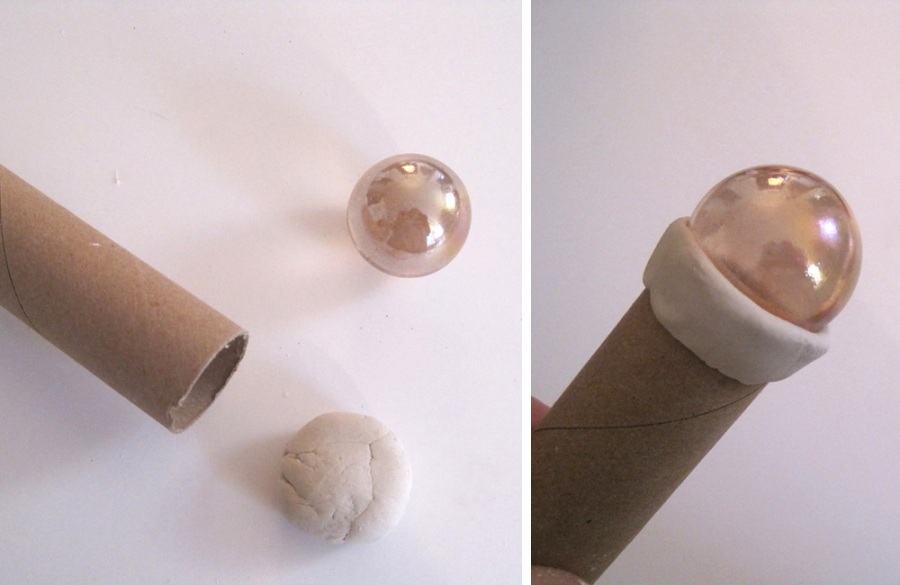
Step 12
- Roll another chunk of paperclay into a ball around the
same size as your large glass marble. Press it into the open
end of the cardboard tube. Again, if you can press the clay
around the end of the foam board handle inside the tube,
this will help the clay stick inside the opening. Then mold
the clay into a rough cylinder and press the glass marble
into it to make a cup-shaped impression where you will later
glue the marble. Remove the marble for now.
Step 13
- Now let the clay dry thoroughly. This will probably take
several days. Check it a few times while it's drying to make
sure the clay isn't shrinking too much. A little shrinkage
and cracking is to be expected. But if the dragon's mouth
shrinks away from the foam board blade, press it back into
place and secure it with string or a rubber band. Just don't
bind it too tightly or the string/band will leave marks in
the clay. Also, be sure to store the unused paperclay in a
zip-lock bag or airtight container so it doesn't dry out.
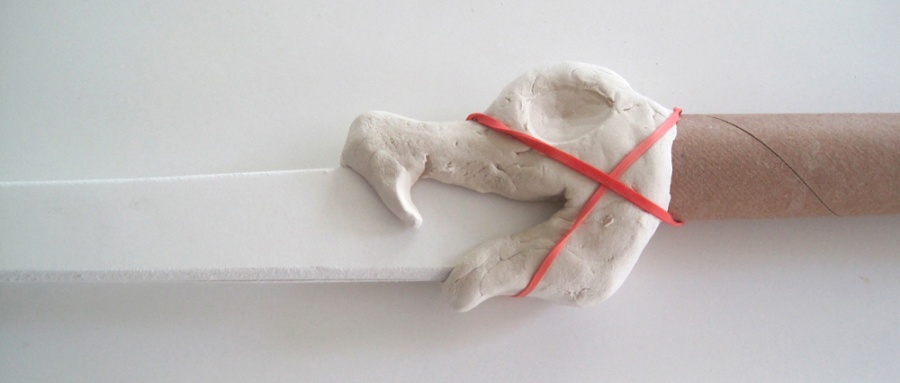
Step 14
This tutorial continues on a
second page.
This is part 2 of a 2-page
tutorial. Part 1 can be found
here.
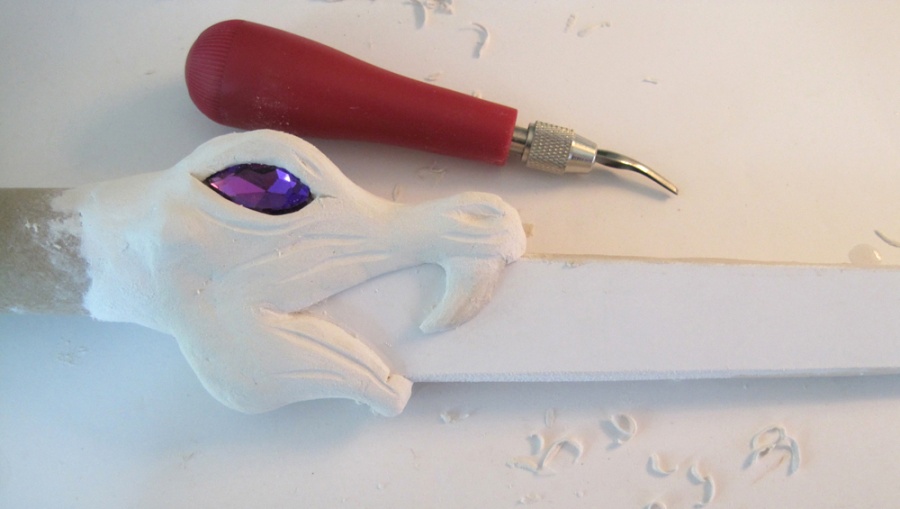
- When the clay is thoroughly dry, you can
continue carving the details of your dragon's
head using your X-Acto knife and/or a set of
linoleum cutting blades. You'll also want to
smooth away rough patches with sandpaper and
fill in any gaps or cracks with wet paperclay.
If necessary, add more water to the clay to make
it easier to work with and/or wet your fingers
and use them to smooth the clay. It's a good
idea to carve and patch a little, let everything
dry and then repeat the process. You may need to
do this several times to sculpt the head to your
liking.

Step 15 - carving dry clay with a linoleum
cutter
Step 15a - patching and building up with wet
clay
- When your main carving is in good shape,
place a dot or two of glue in each eye socket
and then place the purple gems where they
belong. Use a rubber band to hold them in place
while the glue dries. Or glue them one at a
time, letting each dry before turning the head
over and adding the other.
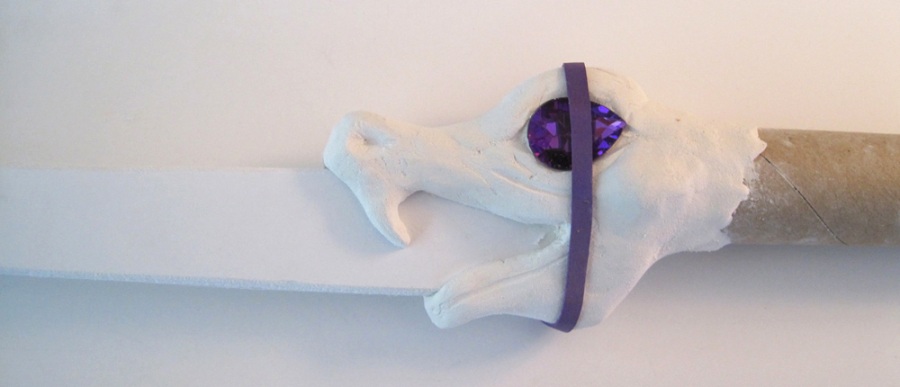
Step 16
- Use more paperclay to build up the eye
socket and brow around each gem. (Although the
clay will hold the gems in place, gluing them
first will keep them from rattling around if the
clay shrinks when it dries.)

Step 17
- At this point, you may also want to patch
any rough spots along the edges of the blade
using wet paperclay. Again, let the clay dry
thoroughly before moving on.

Step 18
- Now finish sculpting the dragon's head and
the bezel at the end of the dagger handle where
the marble will fit. Sand everything smooth,
brush away any leftover chunks of clay, and wipe
down the entire surface with a damp cloth to
remove any powdery residue left behind after
sanding. Then let the dagger dry while you set
up your painting area.
Step 19
- Spray painting should be done outside on a
nice day or in a very well ventilated area. Do
not spray if it's raining or very humid, since
the moisture in the air will dull the paint, and
it will take forever to dry. Line your work
surface with newspaper. Use masking tape to
cover every bit of the purple gems so they won't
get paint on them. Trim the tape with your
X-Acto knife so it fits precisely. Set the glass
marble on a ring, spool or even a small chunk of
clay so it's not touching the work surface and
won't roll away. (Of course, if you were able to
find a red glass marble, you won't need to paint
it, so you can skip this step.)

Step 20
- Spray primer lightly but evenly over the
marble and the entire surface of the dagger. You
may need to prop up the dagger as you work, or
spray one side, let it dry and then turn it over
to spray the other. Let the primer dry
thoroughly before moving on.

Step 21
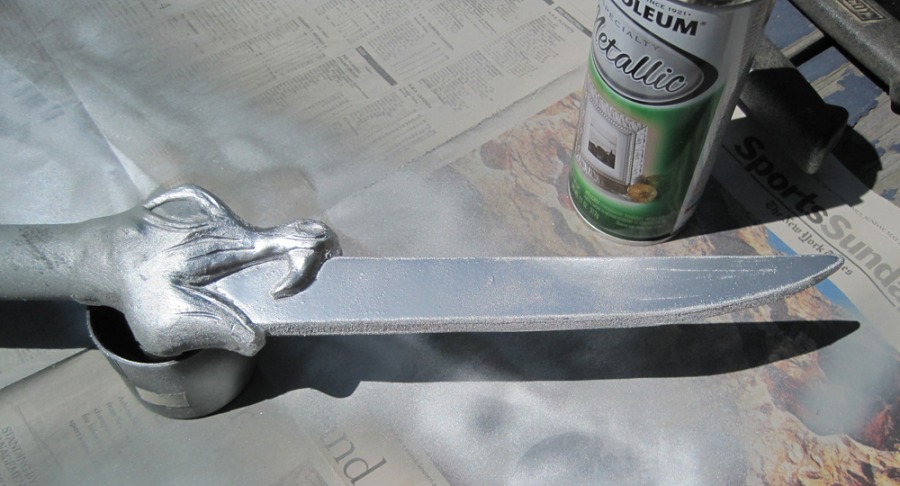
- Now spray the blade with silver enamel. It's
OK if you get a little silver on the dragon's
head. You'll fix that later. Don't spray too
much at once or the paint will look drippy. It's
better to do a few light, even coats, letting
the paint dry and turning the dagger over
between coats.
Step 22
- Spray the marble with high-gloss red enamel.
Use a light touch. You can always go back and
add additional coats of paint once the first
coat is dry. (Again, if you were able to find a
red glass marble, you can skip this step.)

Step 23
- Do not remove the tape that you used to mask
the dragon's eyes. When the silver paint is
completely dry, use more masking tape to cover
the entire blade portion of the dagger. Again,
use your X-Acto knife to cut curves so the tape
fits right up against the edge of the sculpted
dragon's head.
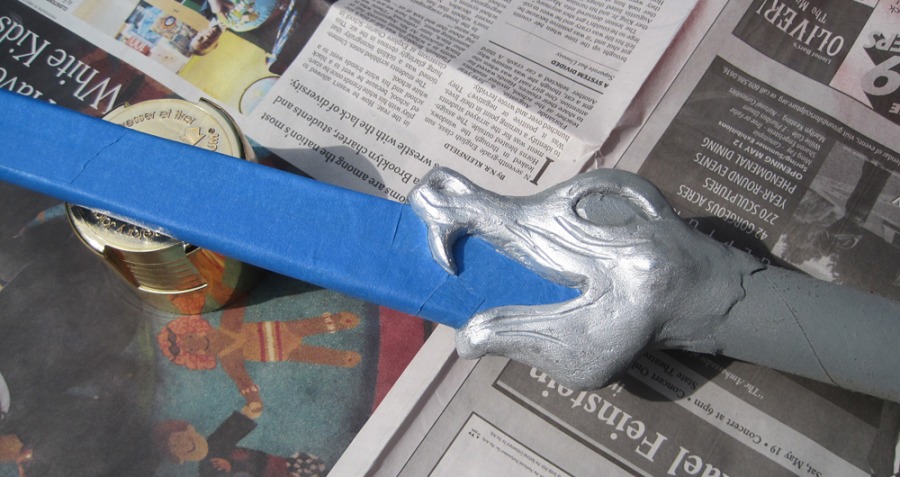
Step 24
- Spray the dragon's head and the bezel at the
end of the handle with gold enamel. As with the
other paints, it's better to do several light
coats, letting the paint dry thoroughly in
between.

Step 25
- If your metallic paints don't seem shiny
enough, you can clear-coat the entire surface
using high-gloss polyurethane spray. Again, a
few thin layers are better than a single gloppy
coat. Just be patient and let each coat dry
before applying the next. Also be sure to leave
the masking tape in place over the dragon's eyes
when you apply the clear coat. I didn't end up
doing this step, but it's an option. [NO PICTURE
FOR THIS STEP]
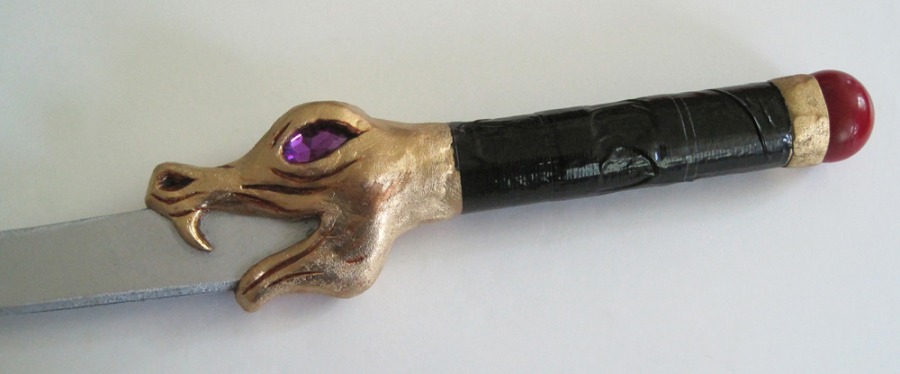
- When the paint is completely dry, remove the
masking tape from the blade and the dragon's
eyes. At this point you can paint in more detail
by hand if you like. I used brown ink to shade
in the carved spots on the dragon's face, its
nostrils, and the edges of the eye sockets where
they meet the gems. I had to mix a little white
glue with the ink to make it stick to the
glossy, gold spray paint. I also used
water-based gold model paint to touch up tiny
spots I'd missed with the spray. (I already had
the ink and gold paint for painting Warhammer
models, but if you don't want to buy these, you
can use brown or black acrylic or watercolor
paint mixed with water and a little white glue
instead of ink. For the gold, working outside,
spray a little gold spray paint on a paper plate
or scrap of cardboard and then dip a brush into
it and use it for touch-up.)

Step 27
- Use sandpaper to scratch a small area of the
glass marble. If you spray-painted yours red,
scuff the bottom where it rested on the prop
while you were painting it. Wipe the sanded area
clean. Now place a few drops of super glue
inside the bezel at the end of the handle and
glue the marble in place so the scratched area
touches the glue. If it doesn't stick, use a
little more super glue around the inside rim of
the bezel, just not so much that it oozes out.
(You may want to use a few dots of hot glue
inside the bezel as well to hold the marble in
place while the super glue dries. Otherwise prop
the dagger upright and let it sit overnight so
the super glue dries thoroughly.)

Step 28
- Now it's time to finish the handle. If
you're using opaque red ribbon, you can skip
this step. I found some lovely, slightly
transparent metallic red ribbon. So, to prevent
the cardboard tube from showing through, I
covered the entire handle in black duct tape.
You could also use black paint or marker
instead.
Step 29
- Wrap the handle with the red ribbon,
covering the entire grip. Try to position the
end the ribbon on the underside of the dagger so
it won't show as much. Use a dot of hot glue to
secure the end or use white glue and hold the
ribbon in place with a scrap of masking tape
while the glue dries (as shown below in step
31).

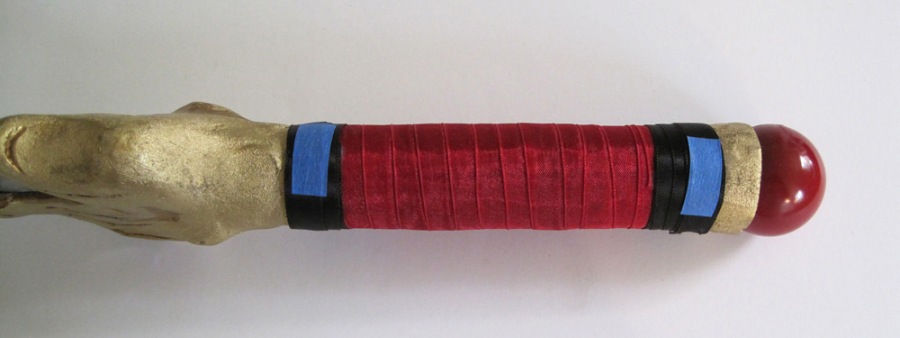
Step 30
- Wrap a length of black ribbon several times
around each end of the handle, where it meets
the gold dragon's head and bezel. If you can
find sexy, black-and-gold ribbon, go for it. I
just used plain black satin. Again, try to
position the ends of the ribbon on the underside
of the dagger so they won't show. Tack the ends
with hot glue or use white glue and a little
masking tape to hold the ribbon while it dries.
If the dried glue leaves a little mark on the
ribbon, touch it up with black Sharpie.
Step 31
And there you have it. Your finished Dagger of Xian.
Just be careful you don't stab anybody at your next
convention. Wouldn't want a rampaging dragon wrecking up
the place. ;)
Finished Dagger of Xian prop
STELLA'S ACKNOWLEDGEMENTS: I'd like to
thank FuinurNecrophily and SaschaCraft for inspiring me
to make this project. She's the only Lara Croft
cosplayer I've seen take on the
TR2 Home Sweet Home costume. His wonderful
Dagger of Xian papercraft helped me get the right
proportions for my template.
| |