Reference Picture:

My Version:

Materials you will need
- Faux leather in black
- Faux leather in brown
- FIMO clay or anything that you can be molded for the
belt.
- 4 rings with 1cm each

- 4 carabiners with 1cm each

- 12 rivets (in silver metal)

- 2 metal silver centre bar buckles, 2cm (for the straps on
the legs)
- Card board
- Superglue
- Gold spray paint or gold paint.
- And others materials like pencil, scale, etc.
The measurement units that I will use are all in cm.
1. Belt
Letís begin with the belt; With the faux leather, cut off 2 equal pieces with
width 7 cm and the length you will use your measures as it fits your hips. With
a tape, take your measurements and let 10 cm more, to guarantee that you will
not miss space to put the buckle on (you will glue it).
Your belt wonít be 7 cm wide, because weíre saving 2 cm for the sewing space
(hem). So your belt will have about 5 cm or 5.5cm. Mine have 5.5cm
Now itís important, you will join both parts from the REVERSE, close just one
end, the other one must be not sewn. So now from the sewn end you will put the
reverse part from the inside and now you got the belt in the right side and with
about 5cm.
Now, just for a detail, make 2 sewing lines. for now, we wonít do anything else
here.

2. Buckle
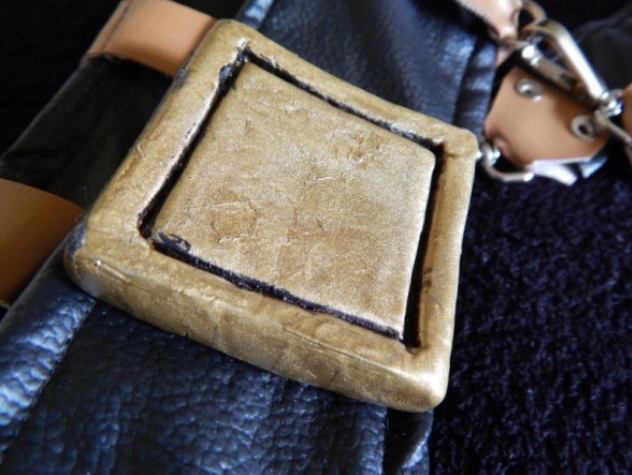
This is the hardest part, at least for me. take your FIMO or any other material
that you want to use to make the buckle. I used biscuit.
The measures are 5cmX5cm.
Attention: I made mine with 5cm cause my belt is 5cm, you have to make
yours based on your belt width.
The dough, biscuit, that I used, is natural colour (white), so after I molded
it, I painted it with gold spray. The result is this:

After it dries, you can make the black details on the inside part, like in the
picture
3. Holsters up strips
Letís begin working on the brown straps on the belt, like this one:

For this, take your brown faux leather and cut 4 strips with 13X2 cm and on the
reverse, join the tips with the ring inside, then, turn in the right side and
itís done.
Now letís make the strip which joins the belt to the holsters. Like this one:

For this, you will cut 4 strips of your faux leather, for 2 of them.
Measurements are 34X6 cm.
Again, join the both parts from the reverse, sew one end and turn to the right
side and sew the other end.
Now on the right side make that same detail from the belt, sew the edges.
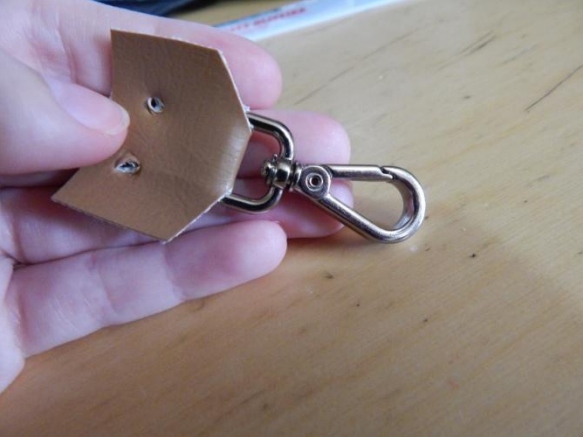
To insert the carabiner clips, the brown detail and the rivets, you first take
your brown leather and cut a piece with 4cmX3cm, bend in the middle and cut off
the edges and leave 1 cm where you will insert the carabiner. Like this:


Now, like it is on the image, make 2 holes in the brown faux leather and on the
tips of the stripe (make sure all holes are at the same level), so you can put
the rivets in like this:

Finish this part by putting the other half of the rivet in to close:

Now, this part is done.
4. Holster gun.
You can do this part with the measures of your gun, or you can use my measures:

First measure the holster and make it out of cardboard, because that one will be
your pattern and the base for your holster so it is well fixed.
Then, cut off the patterns (2 for both sides) of the cardboard, you will cover
all the cardboard with the faux leather and secure it with superglue.
The brown upper part with the rivet is the same thing as seen before, but now
the measures are 4cmX12cm. I made the hole with an drill but it can be made with
an scissors too, or anything you find useful and try not to compromise the
cardboard.
The strips which holds on the gun will depend, again,on the size of your gun. I
made with 1cmX12cm upper part and the low part with 1cmX10cm.
Cut off from the black faux leather 4 strips with 1cmX12cm (for 2 holsters) and
sew one to another in the right side.
The same thing with the strips 1cmX10cm. Now, with the brown leather cut off 4
strips with the same measurements and join in the
right side with all other strips. Cut 4 black strips and sew them, like in the
item 3, and put in the middle of the brown strip. With the superglue, join the
strips in the cardboard and itís done.
5. Holster leg part.
First take your around the thigh measurement and add 3 or 4cm.
Cut the leather with 1 or 2cm thickness.
After you join the parts (for both legs), make a hole in one of the ends and put
the silver buckle through it, put it on and make a hole where you're going to
close it.
To join this part to the holster gun, you can do it my way, or whatever you
prefer

If you like to paint or cover this side where the cardboard is showing, is up to
you, I didnít cause I didnít have black spray xD
6. Back to the belt.
You can do it different, but I glued the buckle (after it dried) on the belt,
with superglue and to close and open I used Velcro.
When you wear the belt you may see that are to more spaces on your sides of the
hip. It's because the belt is large, so, just cut off that parts and sew again
to fix it
And your belt is done ;)
You can contact me on:
Facebook:
https://www.facebook.com/jessicacroftcosplay
Deviantart:
http://jessicaloyolatr.deviantart.com/
Hope I helped you!
Thanks!
|